
読む前にパッと耳で!この記事のポイント、サクッと音声でお届け
このポッドキャスト音声は、本記事をもとに、AIツール(NotebookLM)を用いて自動生成したものです。発音や言い回しに不自然な点や、内容に誤りが含まれる可能性があります。あくまで「理解の補助」としてご活用いただけますと幸いです。
Microsoft Entra ID(旧称 Azure Active Directory)は、Microsoftが提供するクラウドベースのIDおよびアクセス管理サービスです。この記事では、Microsoft Entra IDにデバイス(Windows 11 Pro)を登録する手順を確認します。
Microsoft Entra ID の大まかな概要は、下記の記事を参考にしてください。
>> 参考記事 :Microsoft Entra IDと Active Diretory ざっくりの違いは?
Entra IDへのデバイス登録(Entra参加)
Microsoft Entra参加することでMicrosoft Entra IDへのデバイス登録、およびデバイスに基づいたセキュリティポリシーを適用することができます。具体的には、デバイスに基づき、条件付きアクセスやMicrosoft Intuneでのデバイス管理、コンプライアンスポリシーの適用などができるようになります。
今回は、Windows11 ProのデバイスをMicrosoft Entra IDに参加させます。
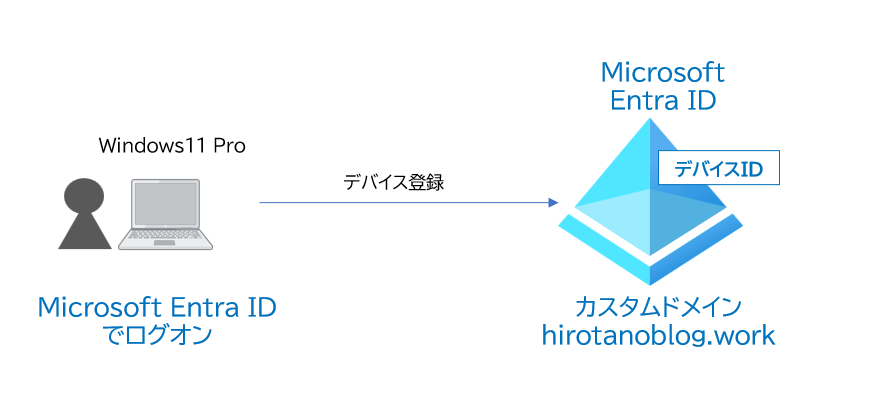
ユーザー(hirotano@hirotanoblog.work)が、Windows 11 ProのラップトップをMicrosoft Entra IDにMicrosoft Entra参加し、デバイス登録します。
Microsoft Entra参加 には、Windows11 からMicrosoft Entra ユーザの資格情報を用いて、サインインします。
Microsoft Entra参加プロセスが完了すると、Entra テナントに デバイスID が登録されます。
ユーザー(hirotano@hirotanoblog.work)は、下記の記事のとおり、Microsoft Entra IDに登録されているものとします。
>> 参考記事 :【Entra ID Connect】オンプレADユーザーをEntraID(AzureAD)に同期する
Entra IDへのカスタムドメインの登録は下記の記事を参考にしてください。
>> 参考記事 :【EntraID】カスタムドメイン名を追加する
Microsoft Entra参加手順(Windows 11 Pro)
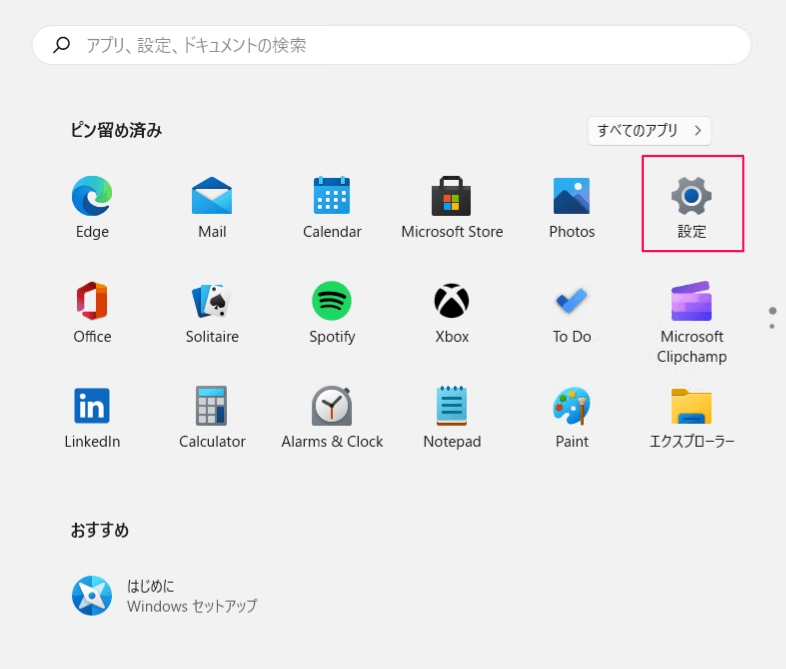
登録したいデバイス( Windows 11) で「設定」をクリックします。
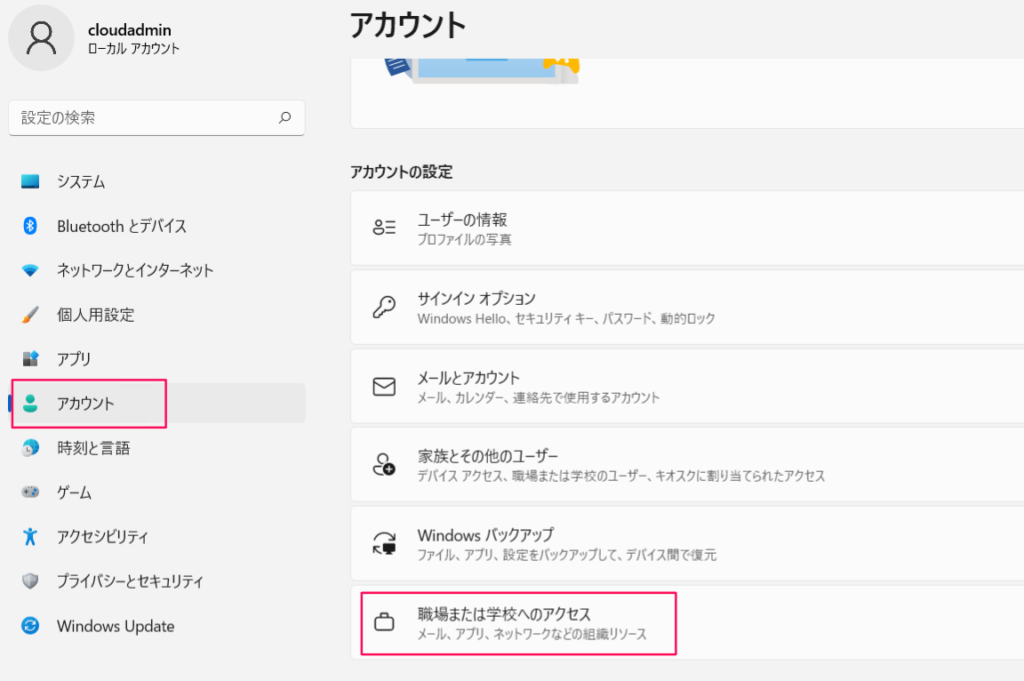
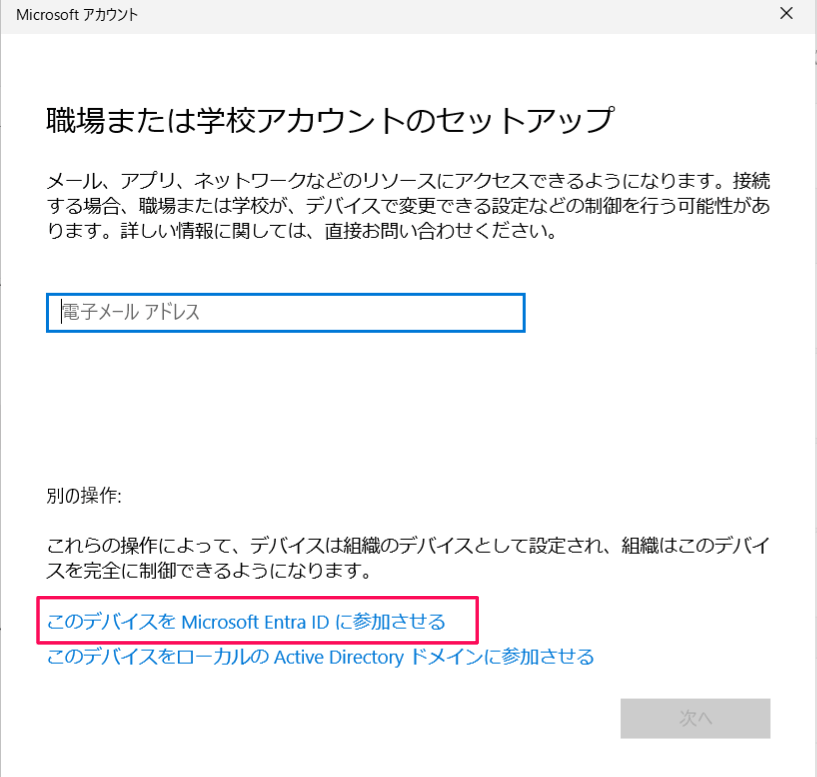
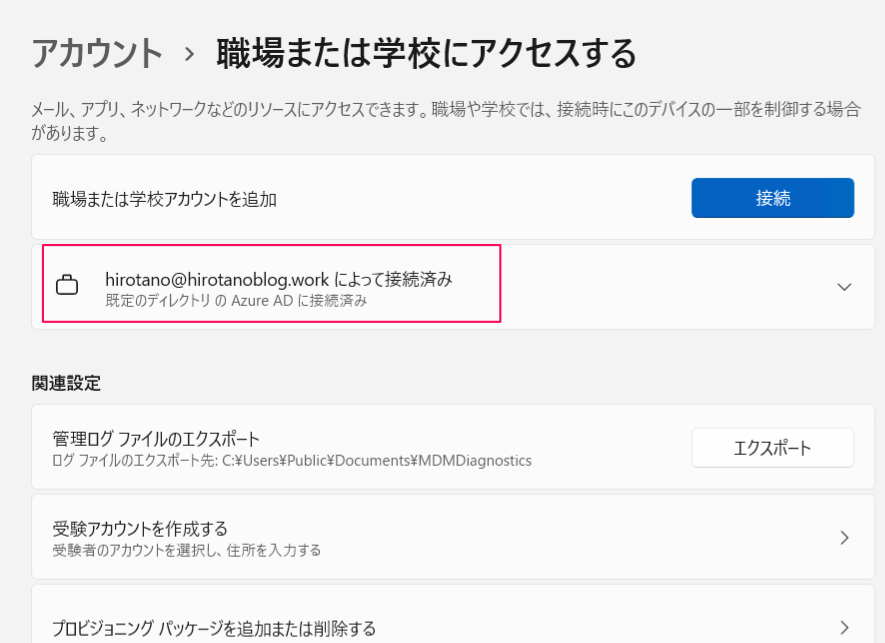
「アカウント」から「職場または学校へのアクセス」をクリックします。
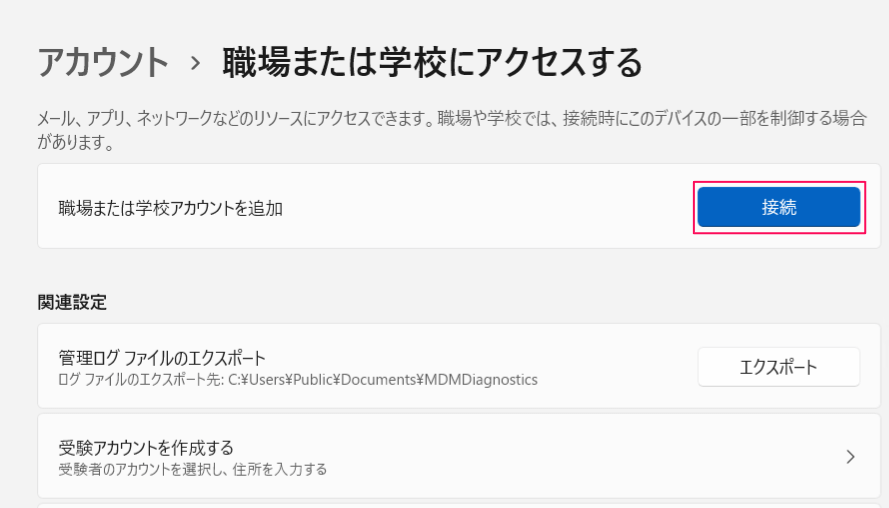
「接続」をクリックします。
「このデバイスをMicrosoft EntraIDに参加させる」をクリックします。
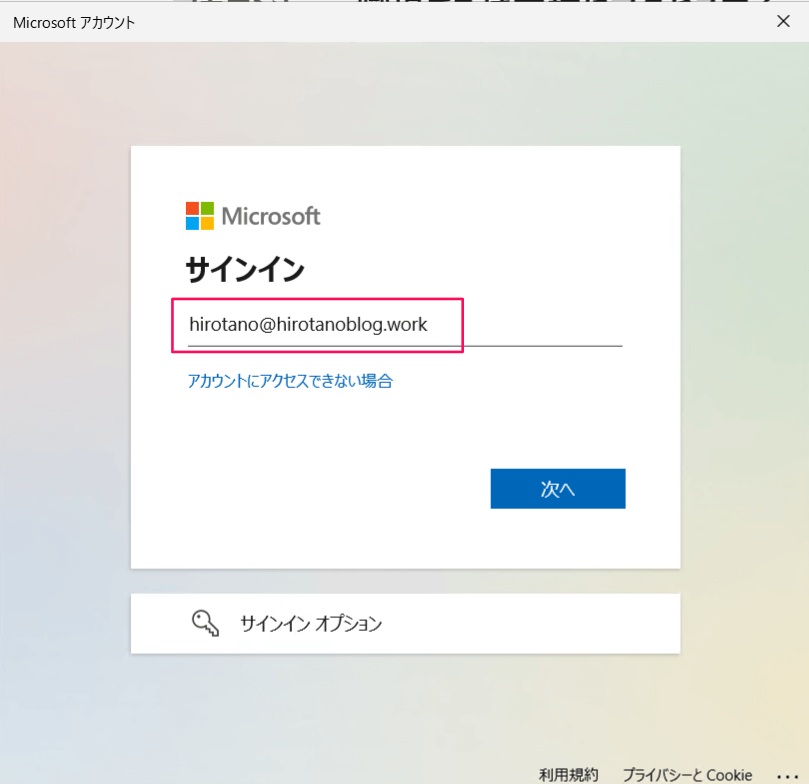
Microsoft EntraIDに登録されているID(今回は、hirotano@hirotanoblog.work ) でサインインをします。
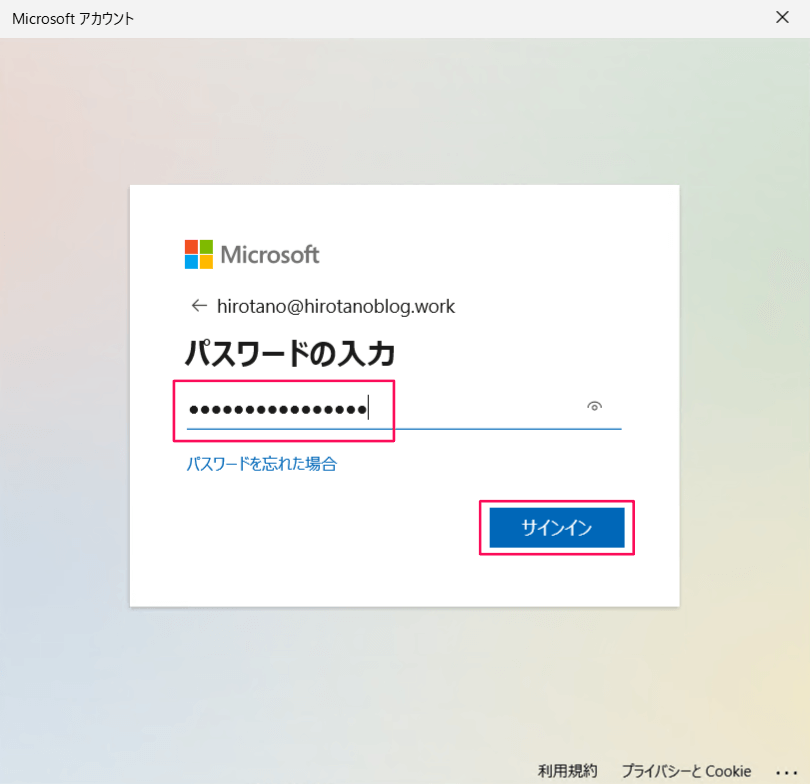
パスワードを入力します。必要に応じて多要素認証も実施し、サインインを完了します。
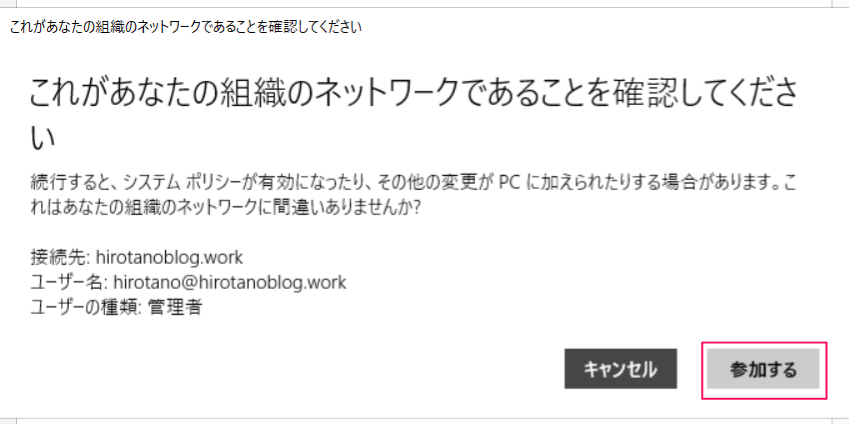
「これがあなたの組織のネットワ ー クであることを確認してください」画面が表示されます。接続先、ユーザ名を確認して、「参加する」をクリックします。
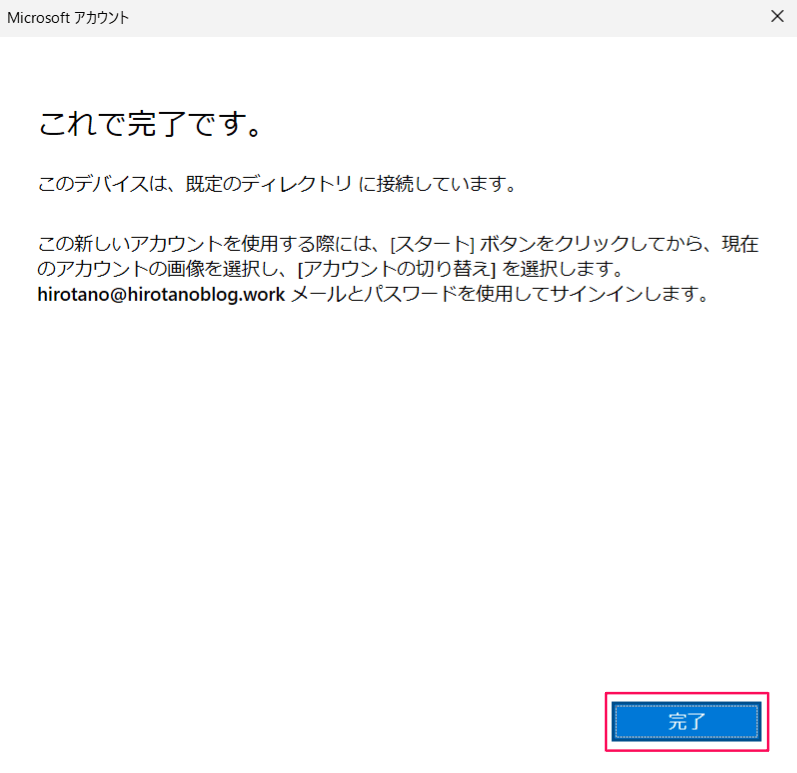
参加が完了した画面が表示されます。「完了」をクリックします。
下記のとおり、アカウントが登録されていることを確認します。
デバイス登録確認(Entra ID)
Entra ID にてデバイスが登録されているかどうか確認します。
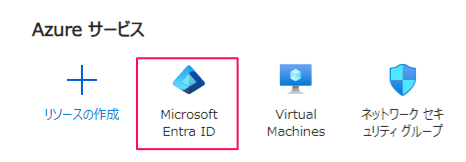
Azure ポータルより、「Microsoft Entra ID」をクリックします。
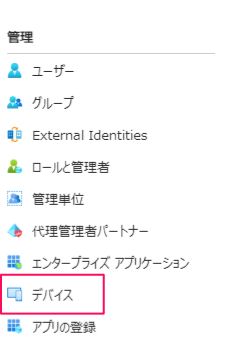
管理メニューより、「デバイス」をクリックします。
左メニューの「すべてのデバイス」をクリックすると、登録したデバイスが確認できます。
「結合の種類」が Microsoft Entra joined で、「所有者」が hirotano であることを確認します。

コメント