下記は、ユーザーがクラウドアプリへアクセスする際に、多要素認証を強制する記事です。
>> 参考記事 :Entra ID – 条件付きアクセスで多要素認証を強制
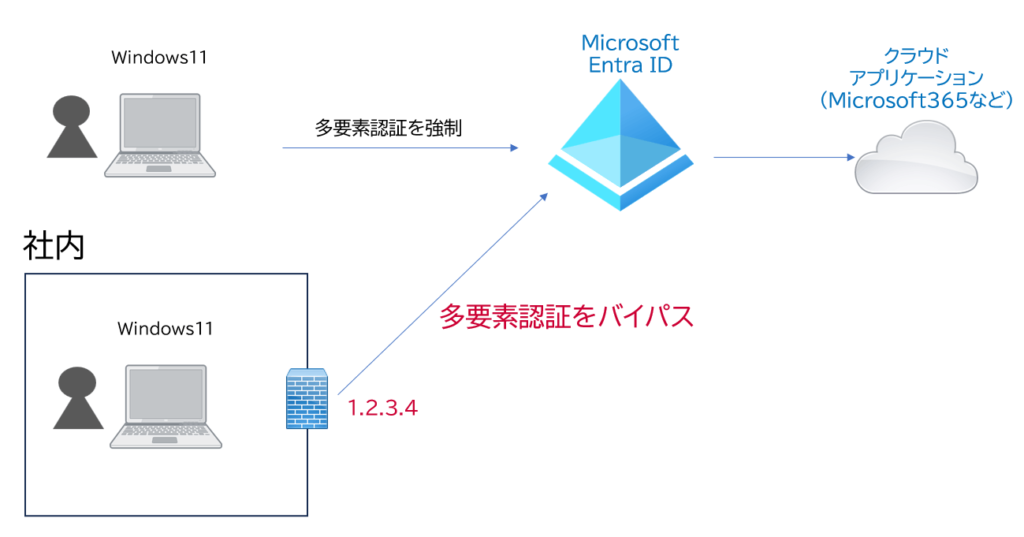
ただし、社内の信頼された場所からアクセスした場合は、多要素認証をバイパスさせたい要件がよくあり、ユーザーの利便性が向上します。
この記事は、上の記事の条件付きアクセスに、社内から接続する際の送信元固定IPアドレス(下記では 1.2.3.4 )を信頼し、そのIPアドレスからの認証は多要素認証をバイパスするように条件付きアクセスを設定します。
多要素認証の信頼済みIPの構成
条件付きアクセスを、「Microsoft Entra 管理センタ(https://entra.microsoft.com/)」で設定します。
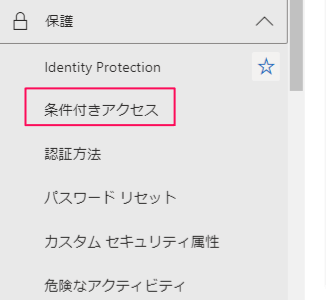
「保護」>> 「条件付きアクセス」をクリックします。
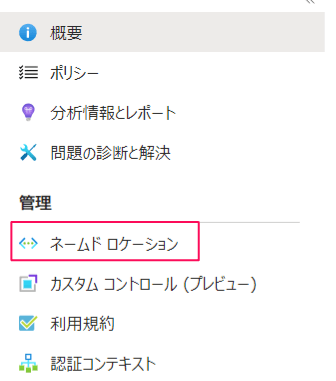
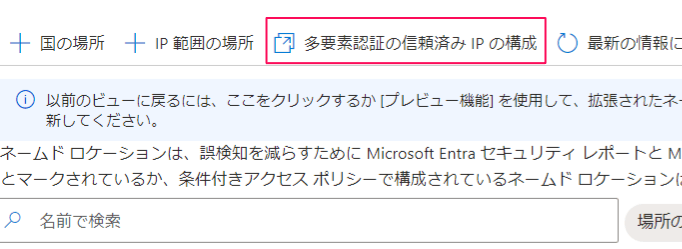
「管理」>>「ネームドロケーション」をクリックします。
「多要素認証の信頼済みIPの構成」をクリックします。
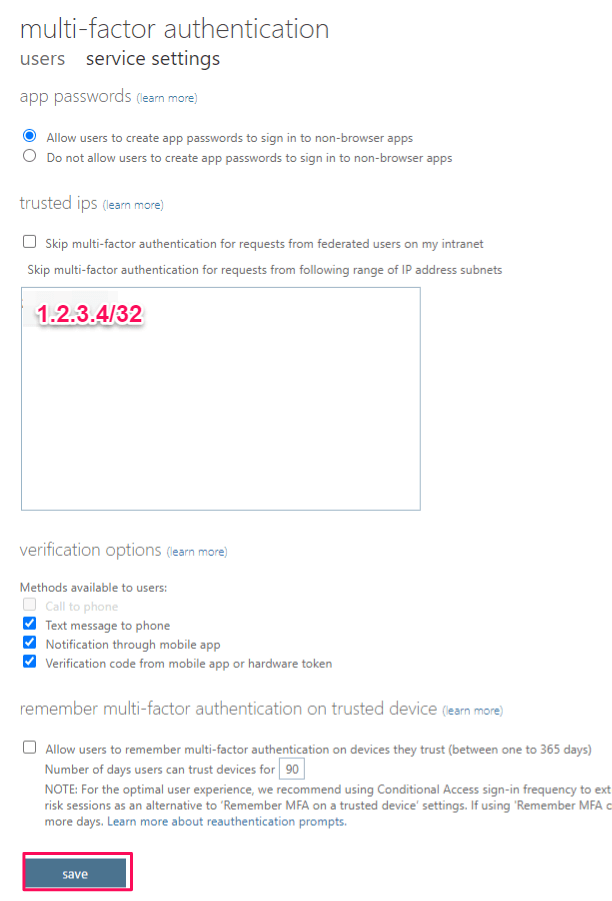
多要素認証をスキップするIP範囲を設定します。CIDR形式で入力します。設定後、「save」をクリックします。
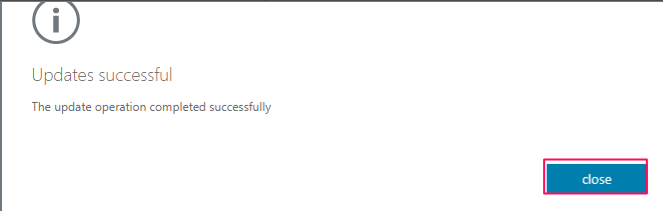
成功すると下記画面が出力されます。「close」をクリックします。
条件付きアクセスの設定
下記記事で設定した条件付きアクセス(MFA強制)を編集します。
>> 参考記事 :Entra ID – 条件付きアクセスで多要素認証を強制「条件」のリンクをクリックし、「場所」のリンクをクリックします。
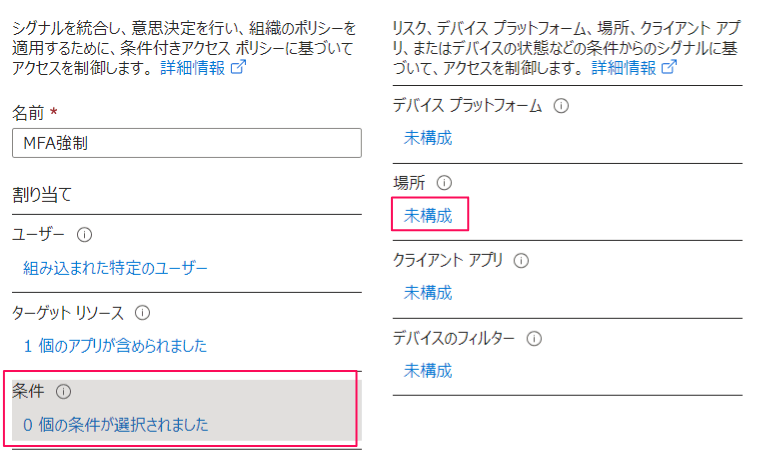
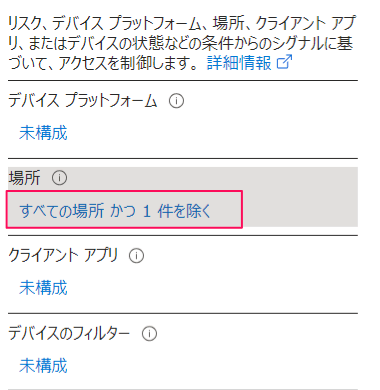
「構成」を「はい」に変更し、「対象外」のタブより「選択された場所」から「選択」のリンクをクリックします。

「多要素認証の信頼済みIP」を選択し、「選択」をクリックします。
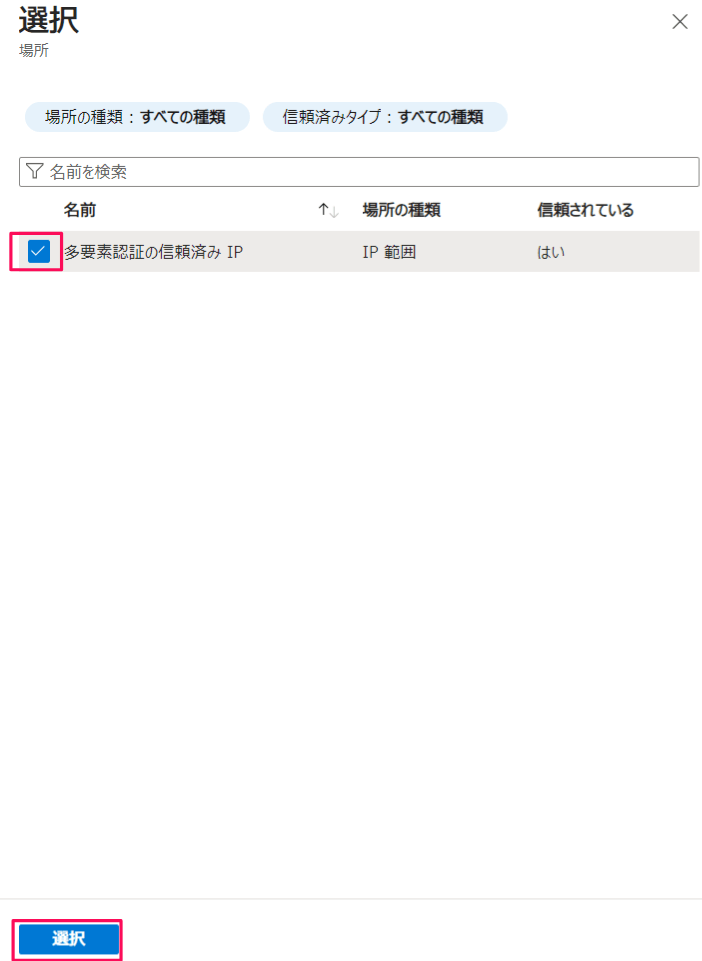
下記のとおり、登録されたことを確認し、「保存」をクリックします。
動作確認
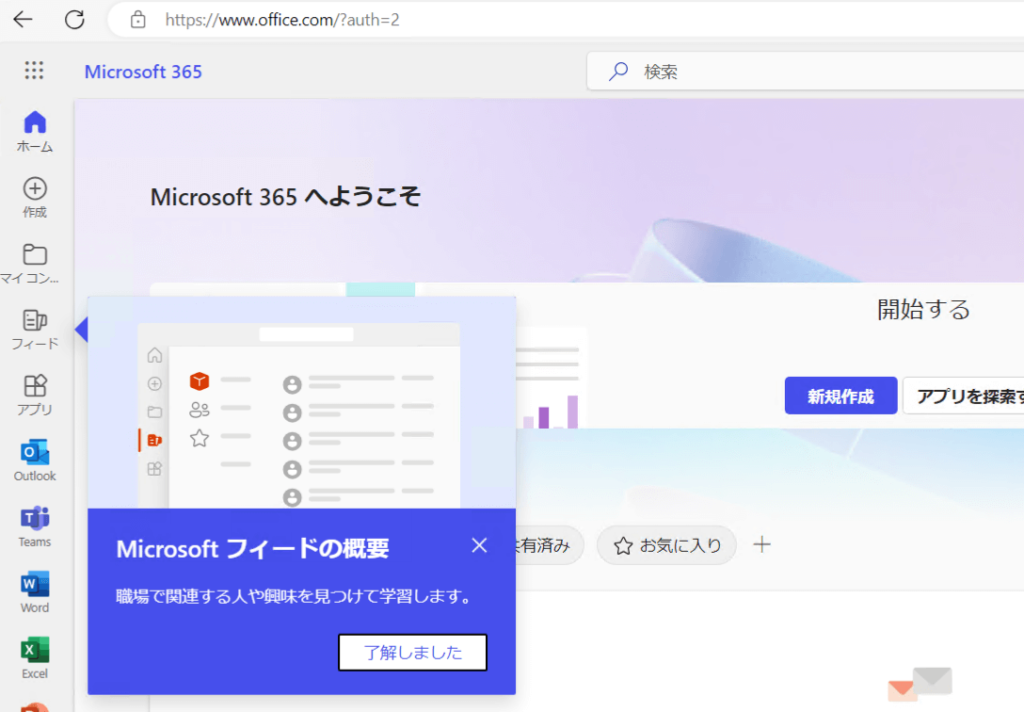
Windows11デバイスに、ユーザ「hirotano」でサインインし、社内である「多要素認証の信頼済みIP(1.2.3.4/32)」 を経由して、Microsoft365ホーム(https://www.office.com/?auth=2)へアクセスします。
すると、多要素認証の画面は表示されず、ホーム画面が表示されます。
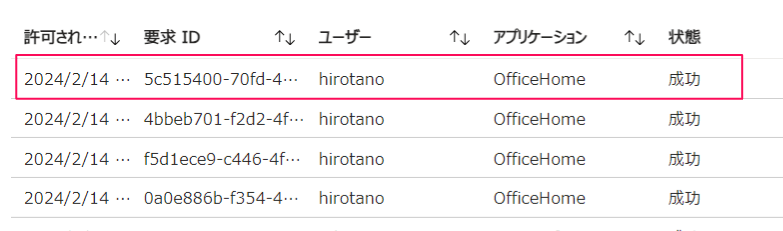
サインインログ
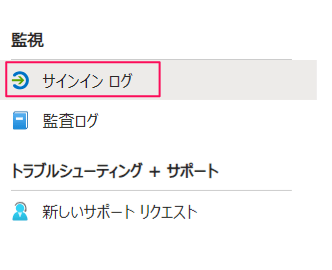
「Microsoft Entra 管理センター」から「条件付きアクセス」の画面メニューより、「監視」>> 「サインイン ログ」をクリックします。
上記のアクセスに関するサインインログ(アプリケーション OfficeHome )が出力されています。
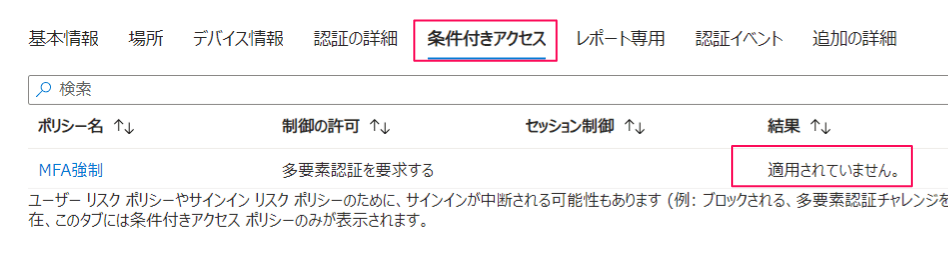
ログをクリックすると、詳細情報が確認できます。「条件付きアクセス」タブをクリックすると、「多要素認証を要求する」の結果が「適用されていません」であることが確認できます。
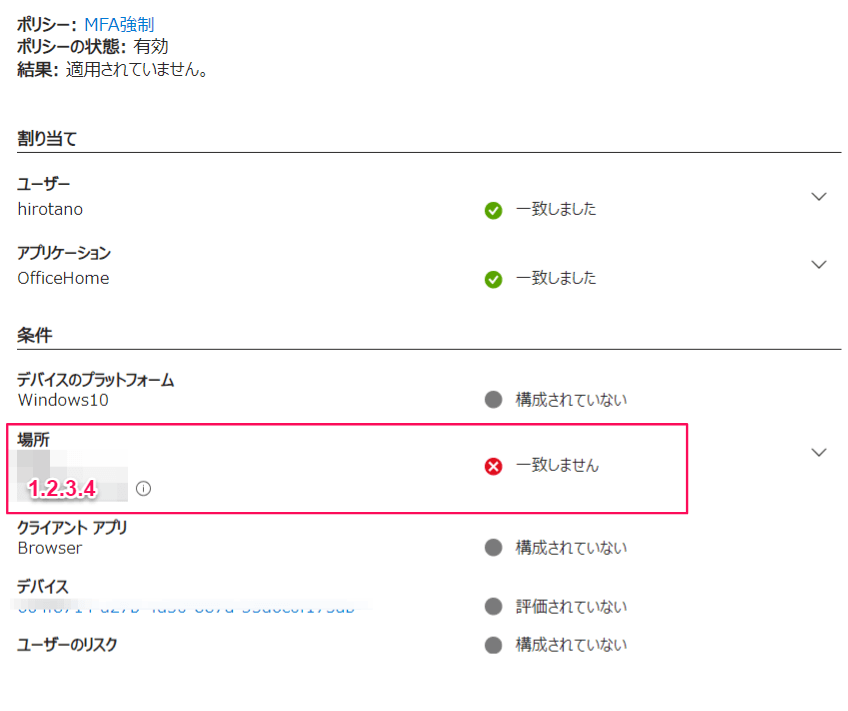
ポリシー名「MFA強制」をクリックすると、さらに詳細が確認できます。「場所」が「一致しません」と対象外の判定とされていることにより、多要素認証がバイパスされています。
コメント