
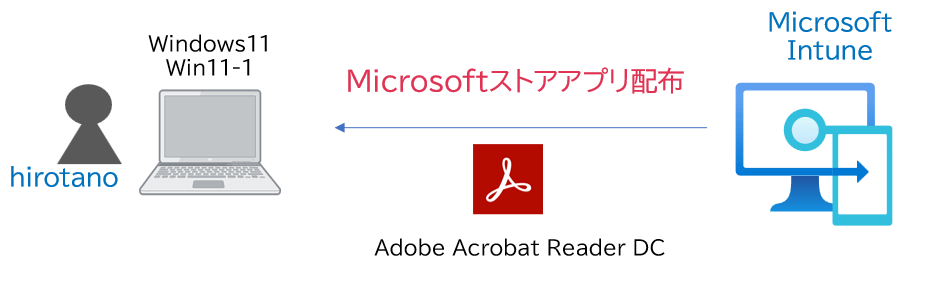
この記事では、Microsoft Store アプリをIntune経由で、Windowsデバイスに展開する手順を確認します。
Microsoft Storeアプリとして、今回は「Adobe Acrobat Reader DC」を展開します。
Intuneでデバイスが登録されていること前提とします。下記の記事を参考にしてください。
>> 参考記事 :Entra ID 参加デバイスをIntuneへ自動登録する
Office などのMicrosoft 365アプリを展開する手順は下記の記事を参考にしてください。
>> 参考記事 :Intune – Microsoft365 アプリをWindowsデバイスに配信
Microsoft ストアアプリ配布の設定
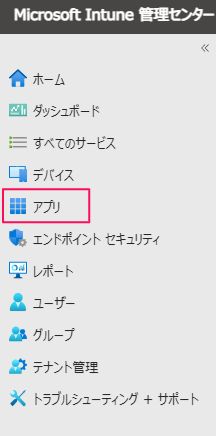
「Microsoft Intune 管理センター(https://intune.microsoft.com/)」より、「アプリ」をクリックします。
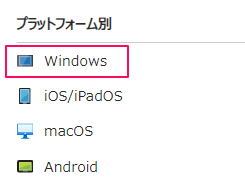
「プラットフォーム別」より「Windows」をクリックします。
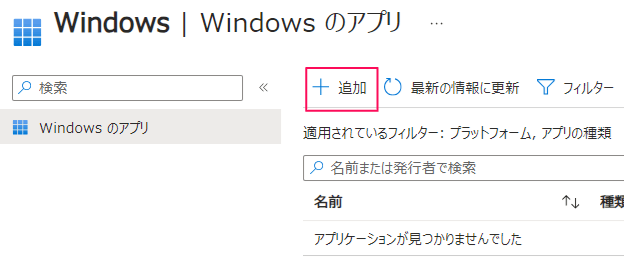
「追加」をクリックします。
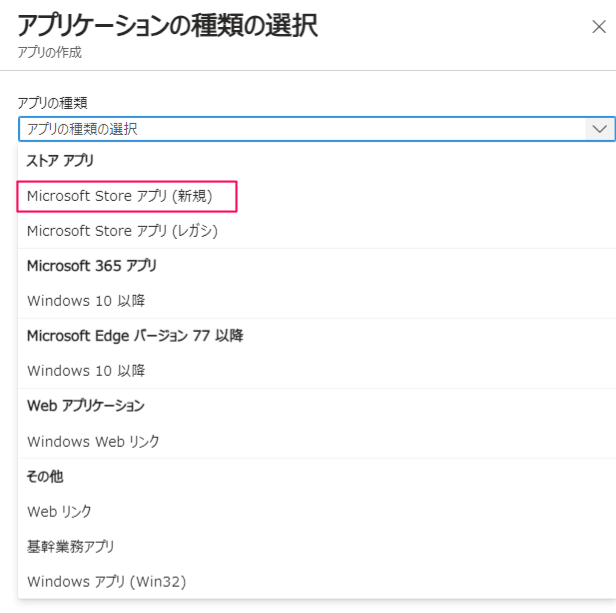
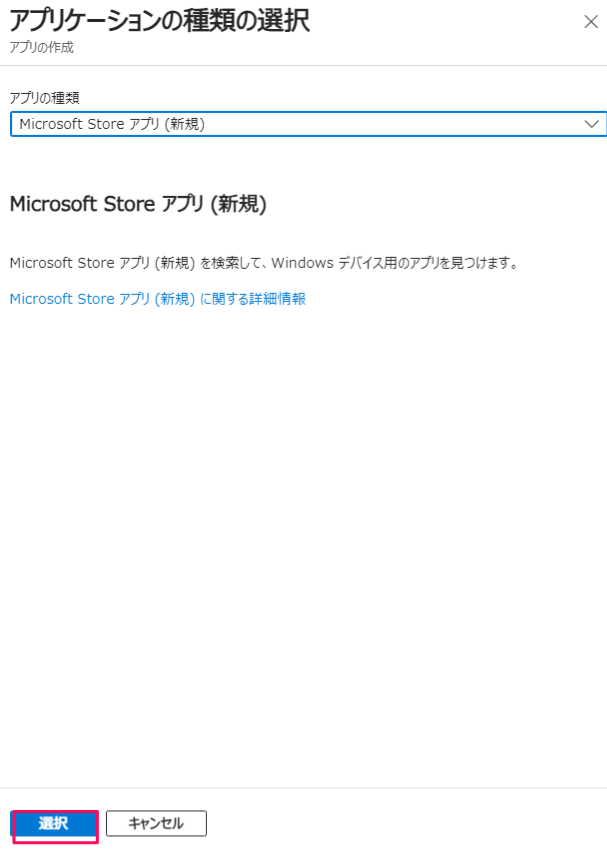
「ストアアプリ」の「Microsoft Store アプリ(新規)」を選択します。
「選択」をクリックします。
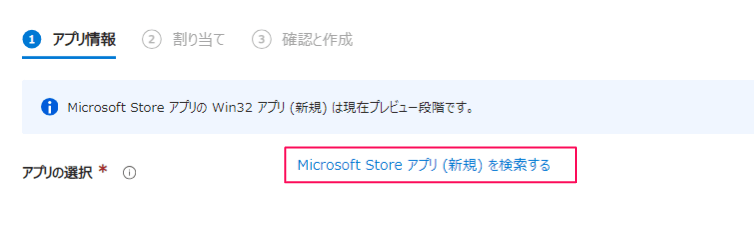
「Microsoft Storeアプリ(新規)を検索する」をクリックします。
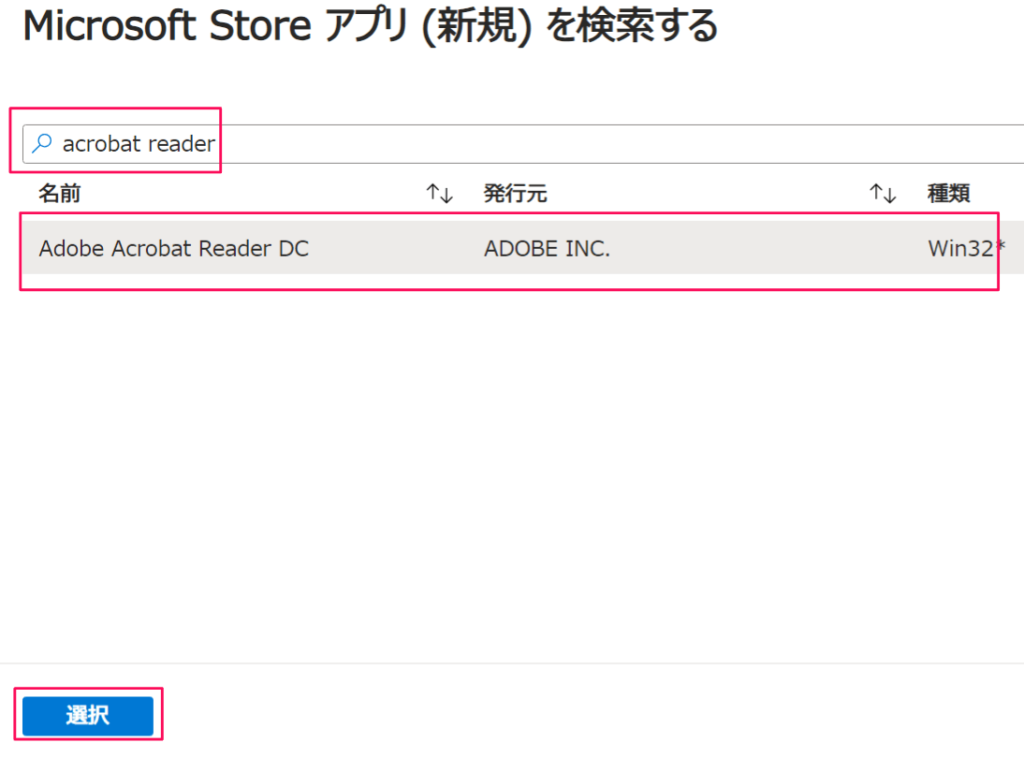
検索に「acrobat reader」と入力すると、「Adobe Acrobat Reader DC」が結果出力されますので、「選択」をクリックします。
「アプリ情報」タブが表示されます。今回は、何も変更せず、「次へ」をクリックします。
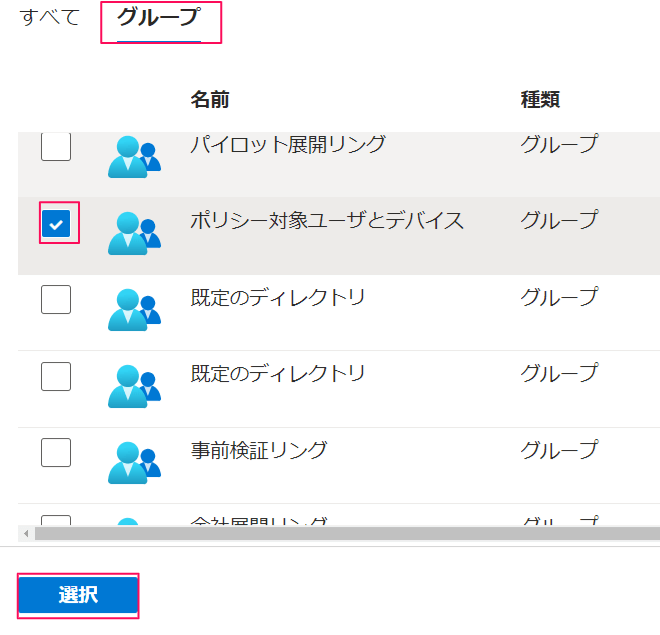
「割り当て」タブで、対象となるグループを選択します。予め「ポリシー対象ユーザとデバイス」という名前のグループを作成し、ユーザ「hirotano」とデバイス「Win11-1」がメンバとして登録されています。
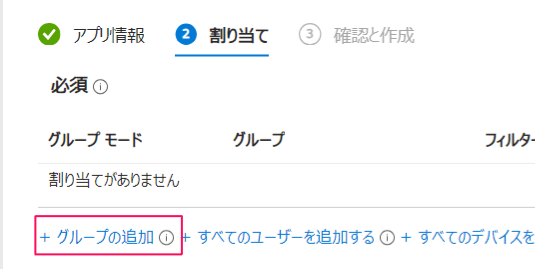
「グループの追加」をクリックします。
「ポリシー対象ユーザとデバイス」を指定し、「選択」をクリックします。
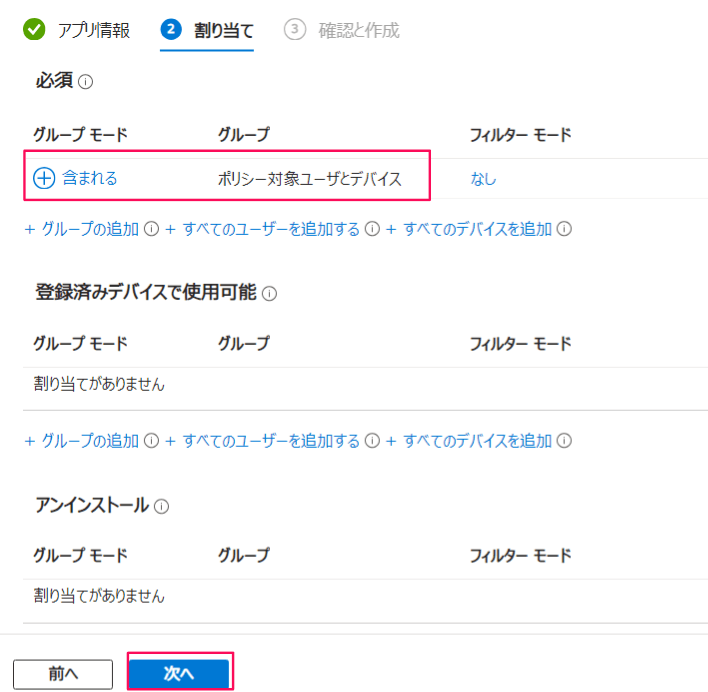
グループが登録されたことを確認し、「次へ」をクリックします。
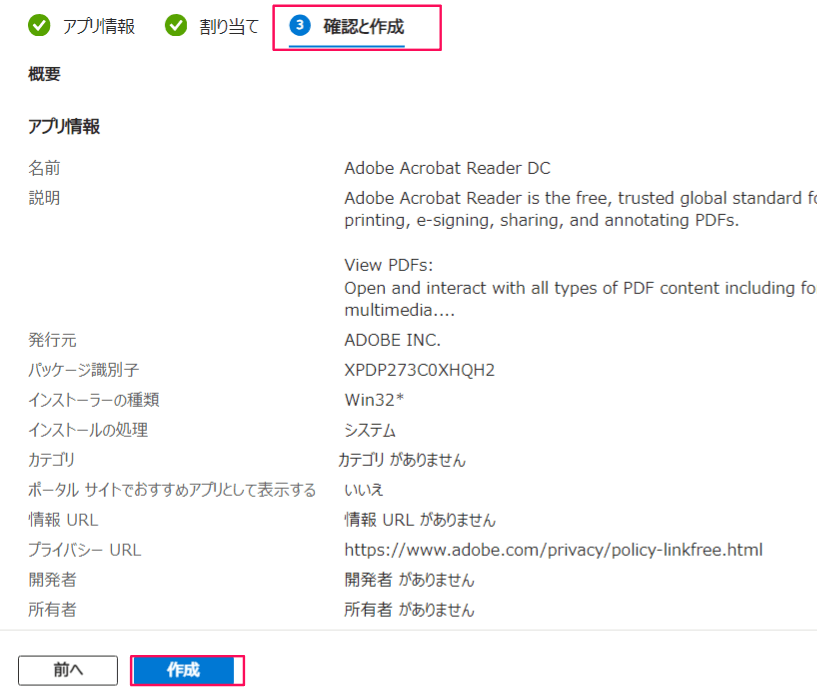
「確認と作成」タブで、設定を確認し、「作成」をクリックします。
下記のとおり、登録されます。

ポリシーをクリックすると、インストール状況が確認できます。

動作確認
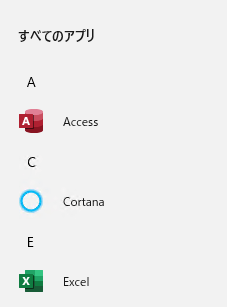
デバイス「Win11-1」には、まだ、「Adobe Acrobat Reader DC」がインストールされていません。
早期のインストールが実行されるよう、デバイスの同期を実行します。デバイス「Win11-1」の詳細画面から「同期」をクリックします。
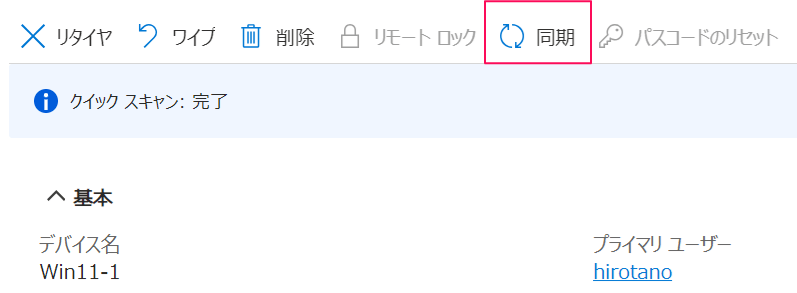
「はい」をクリックします。

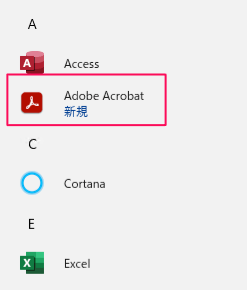
しばらくすると、「Adobe Acrobat Reader DC」が自動的にインストールされます。
インストール状況の確認
「Microsoft Intune 管理センター(https://intune.microsoft.com/)」より、デバイスへのインストール状況を確認します。
「アプリ」>> 「Windows」より設定したアプリの配信設定をクリックします。

「インストール済み」としてデバイスが1台、認識されています。「デバイスのインストール状態」をクリックします。
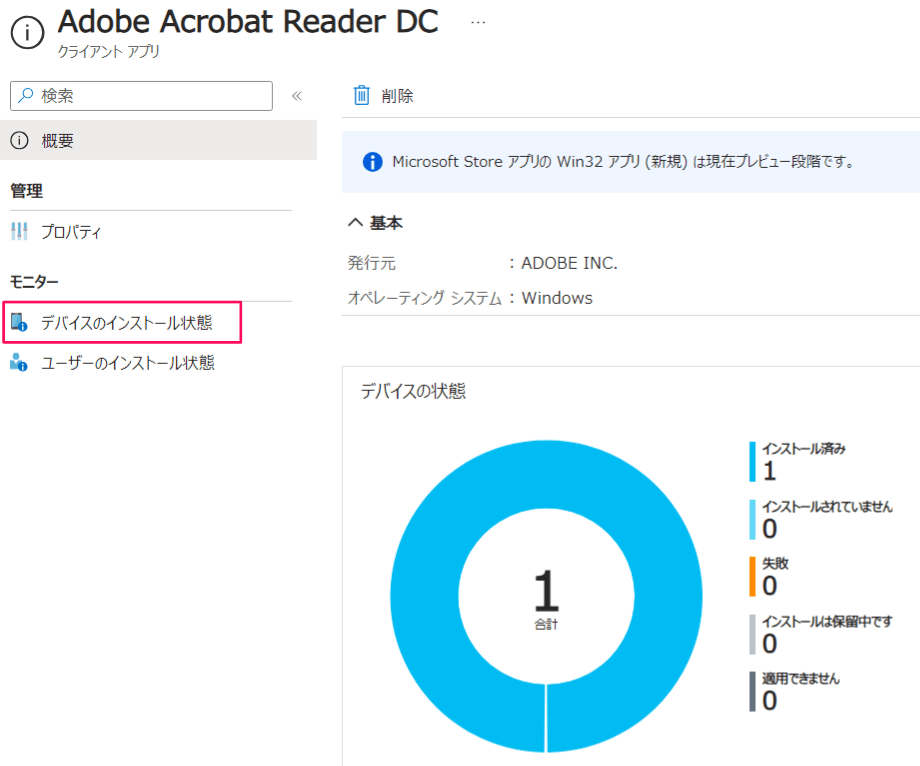
「インストール済み」状態の具体的なデバイスの情報を確認することができます。

コメント