
条件付きアクセスは、ユーザーやデバイスのアクセス条件に基づいて、接続先のクラウドアプリやリソースへのアクセスを制御します。
条件付きアクセスでは、このアクセス条件に応じて、多要素認証を強制させることができます。
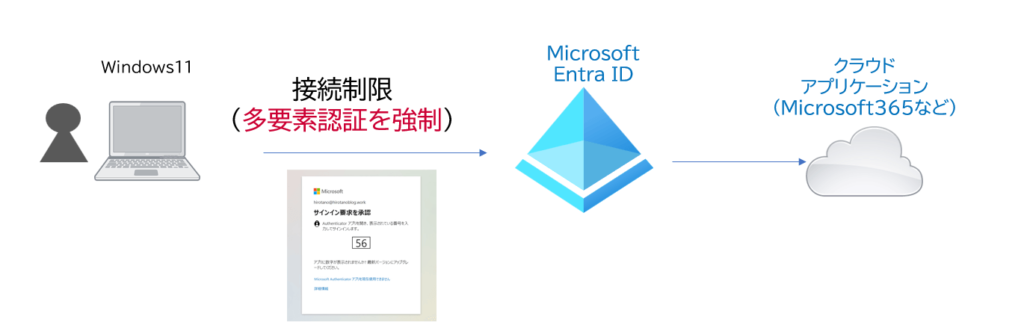
この記事では、ユーザーがOffcie365クラウドアプリへ接続する際に、必ず多要素認証を実行するようにするポリシーの設定手順を確認します。
社内など、信頼される場所からのアクセスに対して多要素認証をバイパスしたい場合は、下記の記事を参考にしてください。
>> 参考記事 :Entra ID – 条件付きアクセス(社外からのみMFA)
条件付きアクセスの設定(Entra ID)
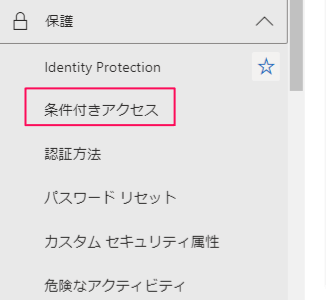
条件付きアクセスを、「Microsoft Entra 管理センタ(https://entra.microsoft.com/)」で設定します。
「保護」>> 「条件付きアクセス」をクリックします。
「新しいポリシーを作成する」 をクリックします。
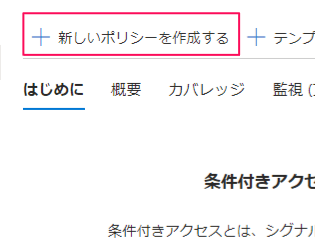
ポリシーを作成します。
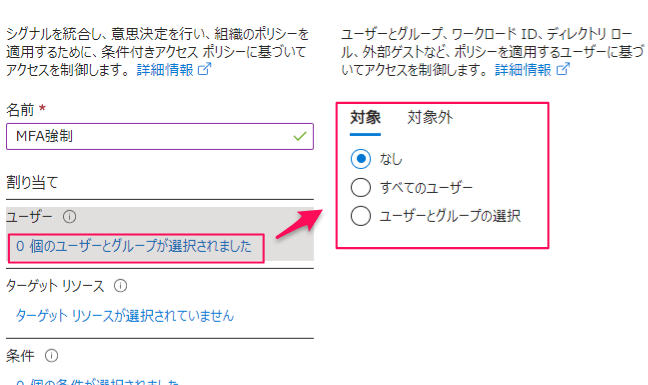
名前
任意の名前(今回は、MFA強制)を設定します。
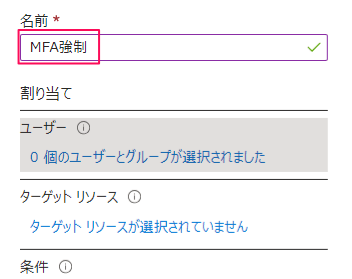
ユーザー
通常は、全ユーザをポリシーの対象とし、一部のユーザーを除外する設定をすることが多いです。
今回は、デモとして、ユーザー hirotano のみを指定します。
ユーザー設定のリンクをクリックすると、対象、対象外のタブが出力されます。
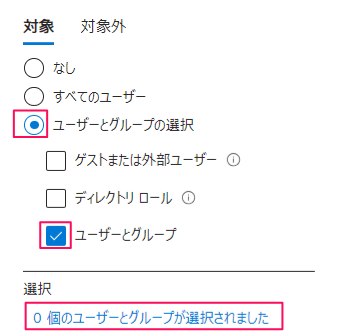
「ユーザーとグループの選択」を選択し、「ユーザーとグループ」にチェックを入れ、「選択」の下のリンクをクリックします。
サインインするユーザ(hirotano)を指定し、「選択」をクリックします。
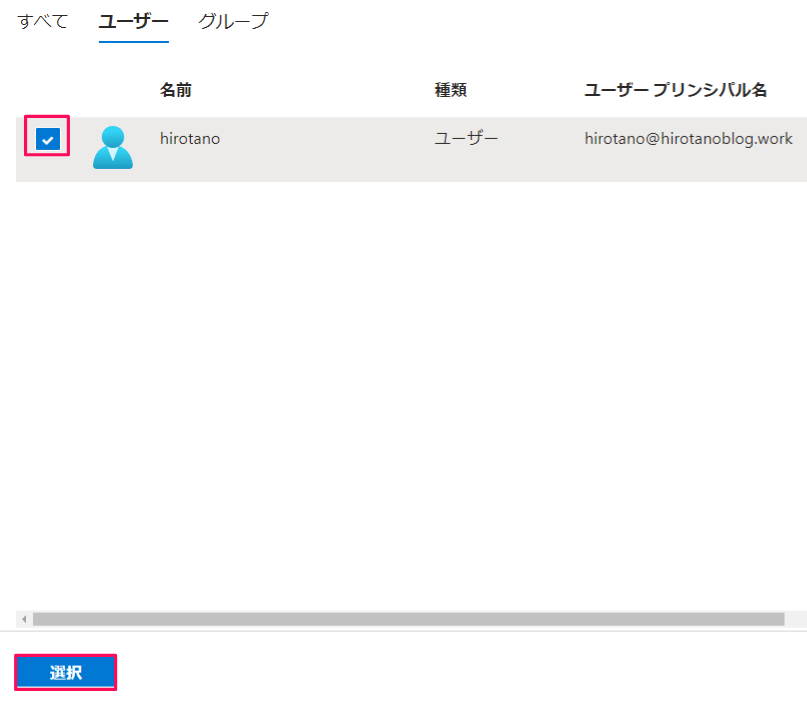
下記のように登録されます。

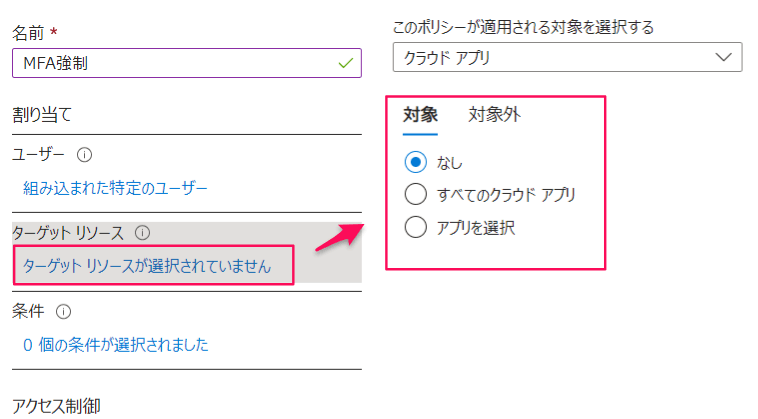
ターゲットリソース
ターゲットリソースとして、Office 365 アプリ全般 を対象にします。
ターゲットリソースのリンクをクリックすると、対象、対象外のタブが表示されます。
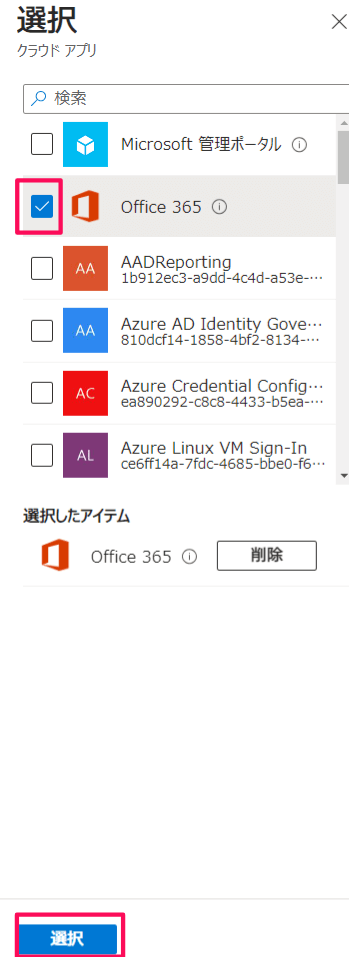
「アプリを選択」を指定し、「選択」の下のリンクをクリックします。

「選択」画面が表示されます。「Office365」を指定し、「選択」をクリックします。
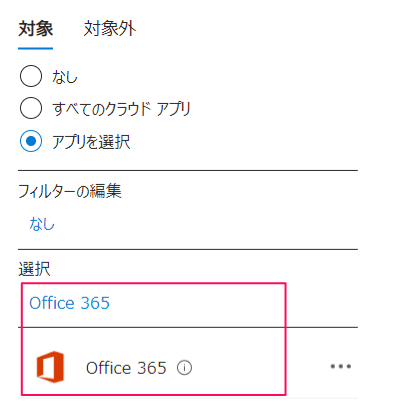
下記のように、登録されます。
アクセス制御(許可)
「許可」の下のリンクをクリックします。

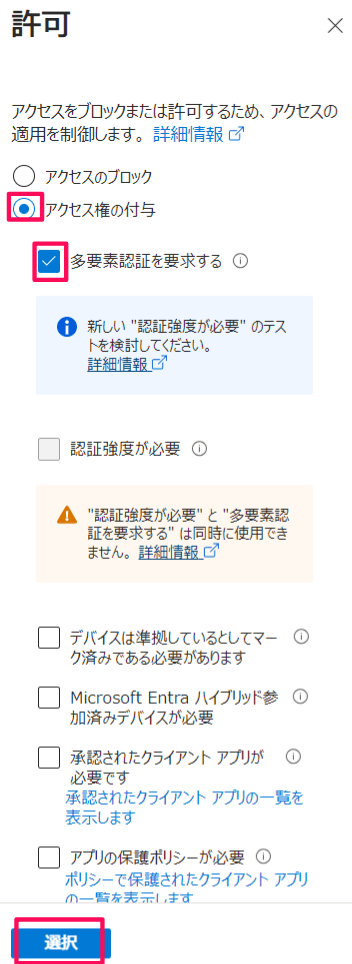
「許可」画面が出力されます。ここでは、アクセスをブロックするのか、もしくは、なんらか条件を付けてアクセスを許可するのかを設定します。
今回は、「アクセス権の付与」を指定のうえ、「多要素認証を要求する」にチェックを入れ、「選択」をクリックします。
ポリシーの有効化
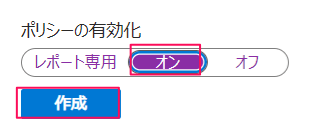
「レポート専用」「オン」「オフ」から選択できます。早速、有効化するため、「オン」を選択します。その後、「作成」をクリックします。
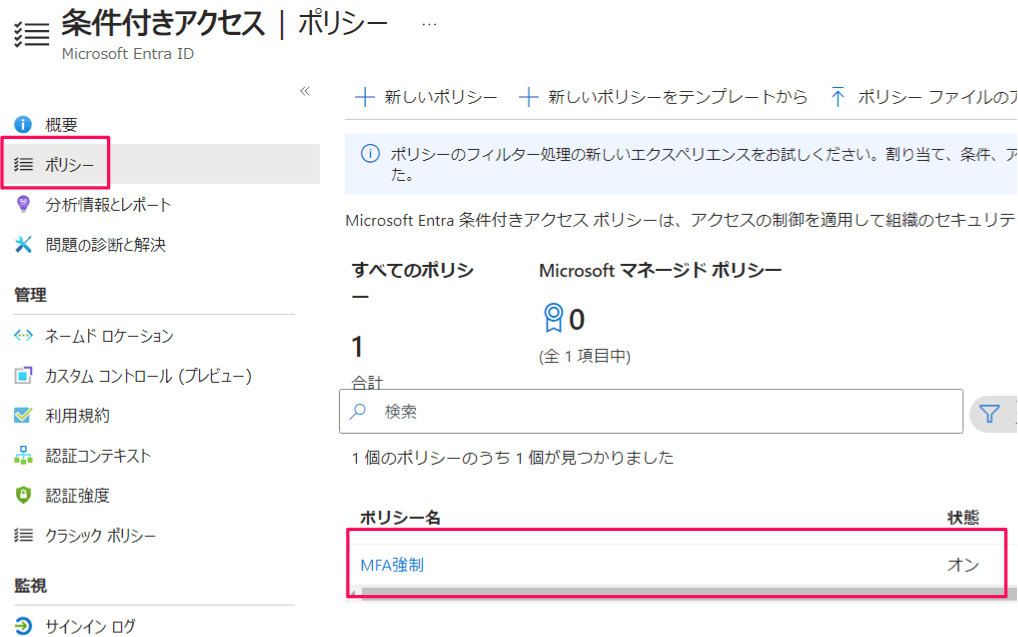
これで、ポリシーが作成されました。
条件付きアクセスの画面で、「ポリシー」をクリックすると、ポリシーの一覧が参照できます。
動作確認
Windows11に対して、ユーザ「hirotano」でサインインし、Microsoft365ホーム(https://www.office.com/?auth=2)へアクセスします。
多要素認証のセットアップが既に完了している場合、下記のように、Microsoft Authenticatorによるサインイン要求が表示されます。
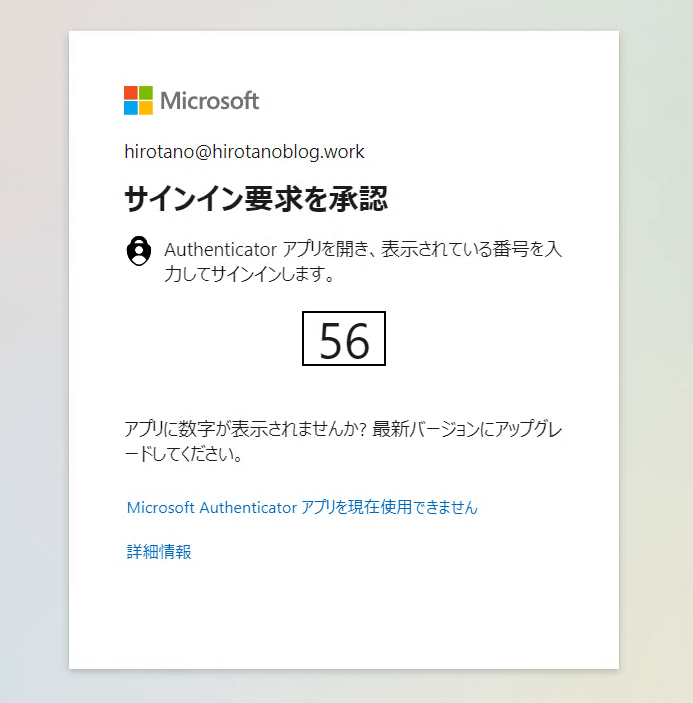
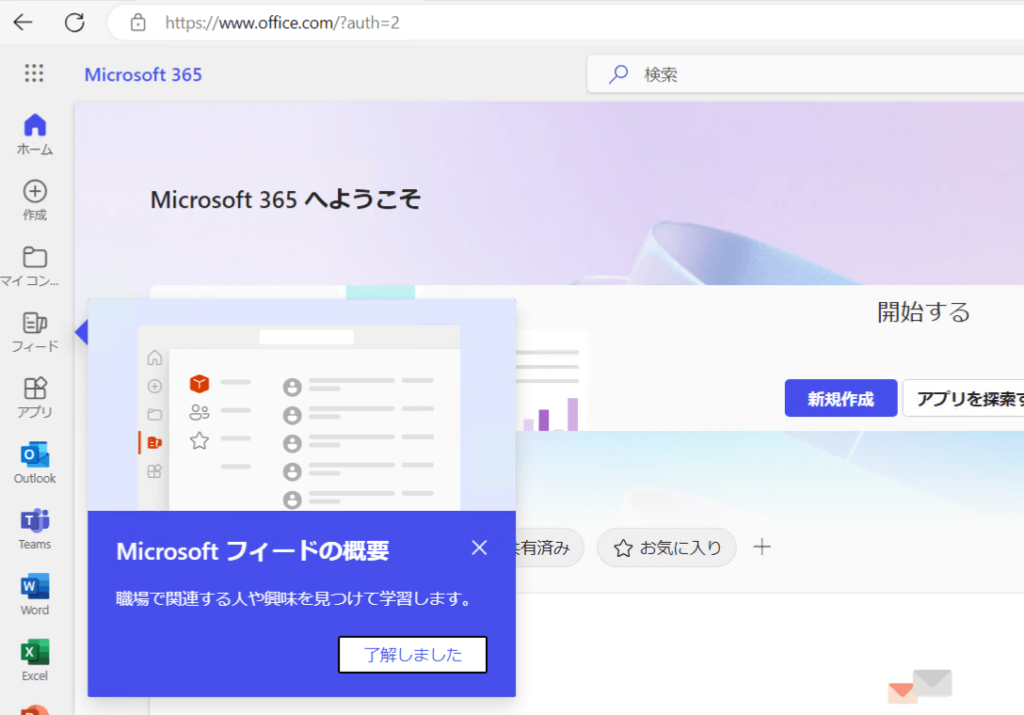
Microsoft Authenticator へ数字を入力し、認証を終えると、Microsoft 365のホーム画面が表示されます。
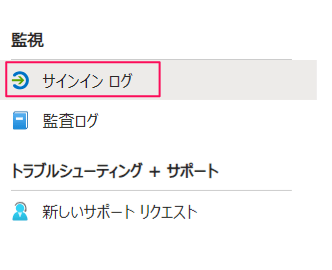
サインインログ
「Microsoft Entra 管理センター」から「条件付きアクセス」の画面メニューより、「監視」>> 「サインイン ログ」をクリックします。
上記のアクセスに関するサインインログ(アプリケーション OfficeHome )が出力されています。

ログをクリックすると、詳細情報が確認できます。「条件付きアクセス」タブをクリックすると、「多要素認証を要求する」が「成功」しています。

コメント