
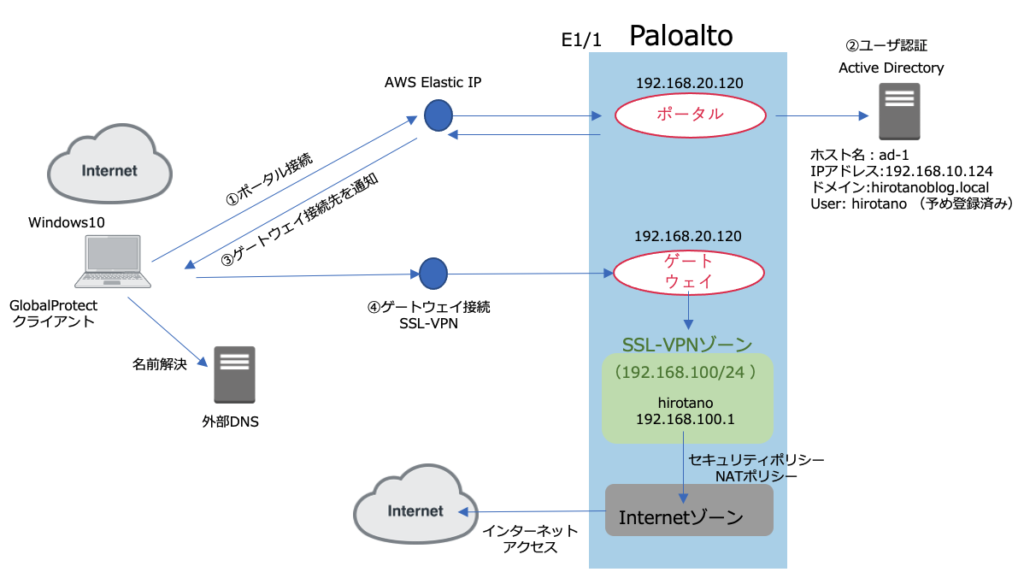
Paloaltoでは、GlobalProtectというSSL-VPN機能により、リモートユーザ向けにVPN接続を提供できます。
以下の記事では、Paloaltoのローカルデータベースを使用してユーザ認証しましたが、今回は、ActiveDirectoryに登録されているユーザで認証します。(予め、ドメインコントローラ(ドメイン名:hirotanoblog.localとアカウントhirotano)を構築済みです)今回は、ユーザ認証部分の変更箇所のみを記事にしますので、先に以下の記事をご覧いただくことをお勧めします。
>> 参考記事 : GlobalProtectの設定(ローカルユーザ)と動作確認 PANOS9.0.9-h1.xfr
バインド用ユーザの作成
まず、PaloaltoがActiveDirectoryからユーザ情報を取得する際に使用するアカウントを登録する必要があります。
サーバマネージャーのツールからActiveDirectoryユーザとコンピューターをクリックし、以下の通り、paloaltoというユーザを登録します。 また、このユーザにはServer Operatorsの権限を付与します。

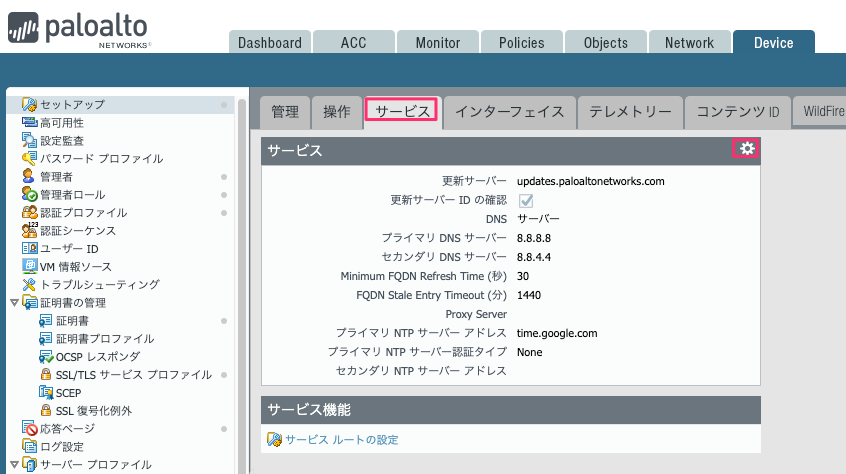
DNSサーバ参照変更
PaloaltoがActiveDirectoryドメインにユーザを照会するため、参照先DNSサーバをActiveDirectory (192.168.10.124)に変更します。
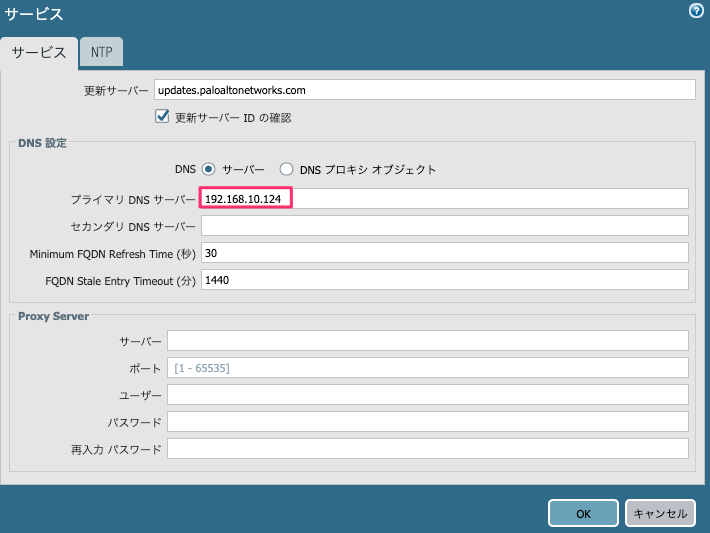
Device >>セットアップ >>サービスより 歯車をクリックし、DNSサーバを192.168.10.124に変更します。
OKをクリックし、コミット後、AD-1の名前解決ができるか確認します。
admin@FW-1> ping host AD-1.hirotanoblog.local
PING AD-1.hirotanoblog.local (192.168.10.124) 56(84) bytes of data.
64 bytes from 192.168.10.124: icmp_seq=1 ttl=128 time=0.292 ms
64 bytes from 192.168.10.124: icmp_seq=2 ttl=128 time=0.331 ms
64 bytes from 192.168.10.124: icmp_seq=3 ttl=128 time=0.370 ms
64 bytes from 192.168.10.124: icmp_seq=4 ttl=128 time=0.403 ms
64 bytes from 192.168.10.124: icmp_seq=5 ttl=128 time=0.396 ms
64 bytes from 192.168.10.124: icmp_seq=6 ttl=128 time=0.524 ms
64 bytes from 192.168.10.124: icmp_seq=7 ttl=128 time=0.360 ms
64 bytes from 192.168.10.124: icmp_seq=8 ttl=128 time=0.307 ms
64 bytes from 192.168.10.124: icmp_seq=9 ttl=128 time=0.412 ms
^C
--- AD-1.hirotanoblog.local ping statistics ---
9 packets transmitted, 9 received, 0% packet loss, time 8003ms
rtt min/avg/max/mdev = 0.292/0.377/0.524/0.066 ms
admin@FW-1>
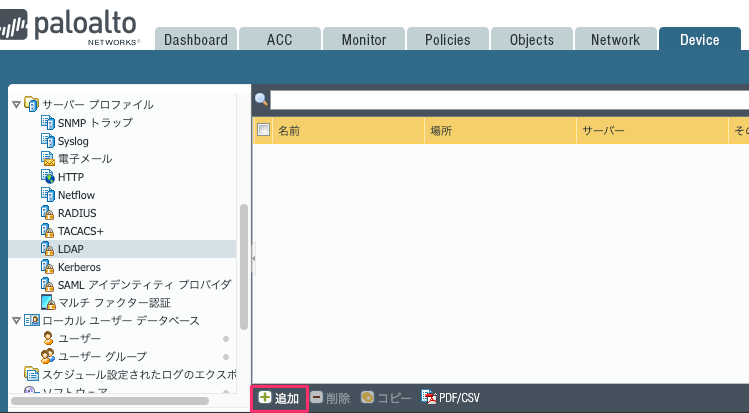
認証サーバの設定
認証サーバとして、ActiveDirectory(192.168.10.124)を指定します。
Device >> サーバプロファイル >> LDAP へ移動し、追加をクリックします。
以下の画面が出力されます。
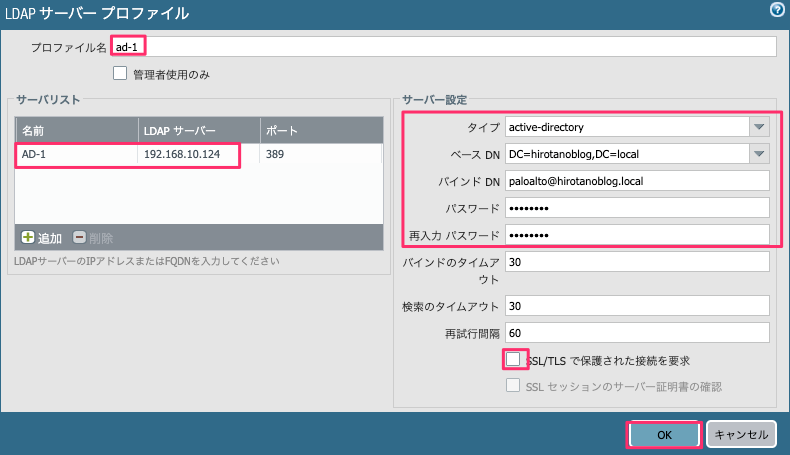
- プロファイル名:任意の名前。今回はad-1とします。
- サーバリスト:認証先のLDAPサーバ(Active Directory)を指定します。追加をクリックし、名前(任意)とサーバのIPアドレスを設定します。
- タイプ:active-directory を指定
- ベースDN:リストより、DC=hirotanoblog,DC=localを選択
- バインドDN:ActiveDirectoryにユーザ照会するアカウント。paloalto@hirotanoblog.localと設定。
- パスワード:アカウントpaloalto作成時に設定したパスワードを入力
- SSL/TLSで保護された接続を要求:チェックを外す
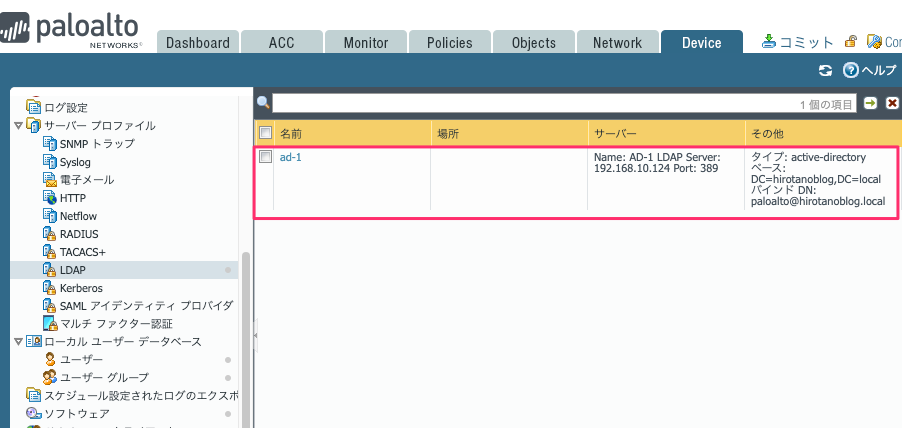
設定後、OKをクリックすると以下の通り、登録されます。
グループマッピングの設定
Active Directoryのユーザーとグループのマッピング情報を取得するため、グループマッピングの設定をします。
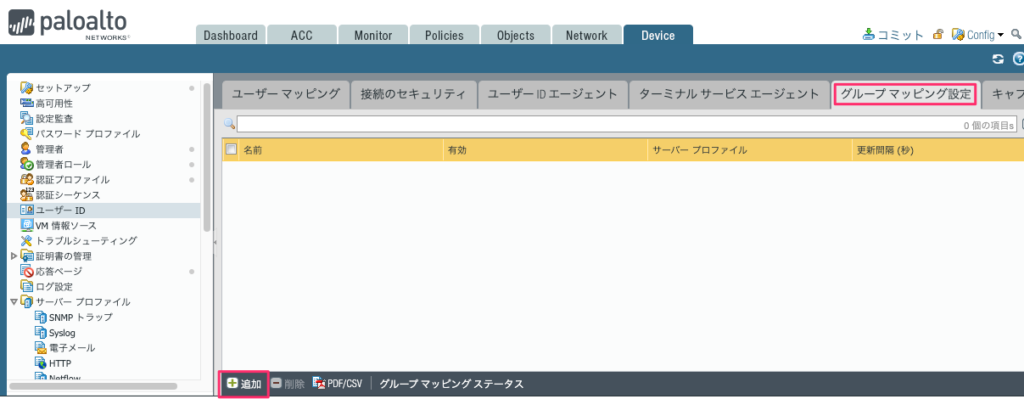
Device >> ユーザID >> グループマッピング設定 へ移動し、追加をクリックします。
以下の画面が出力されます。
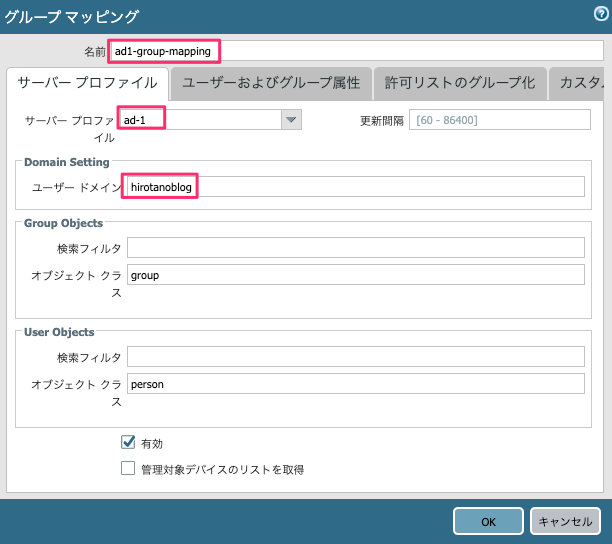
- 名前;任意の名前。今回は、ad1-group-mapping とします。
- サーバプロファイル:ad-1を選択
- Domain Setting >> ユーザドメイン:hirotanoblog と設定
設定後OKをクリックすると、以下の通り登録されます。
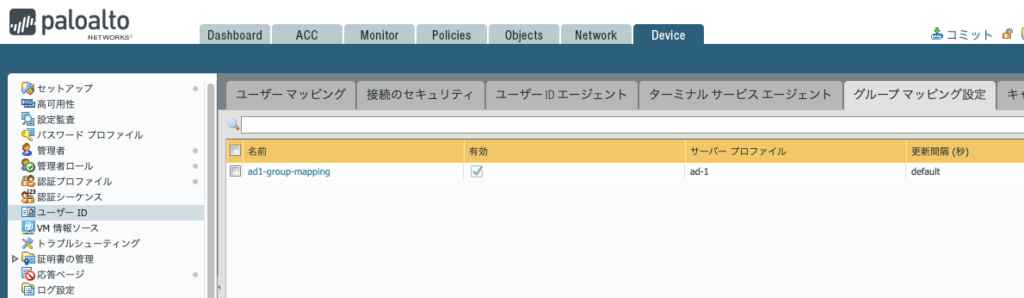
コミットを実行すると、PaloaltoはLDAPサーバ(Active Directory)にアクセスを試みます。
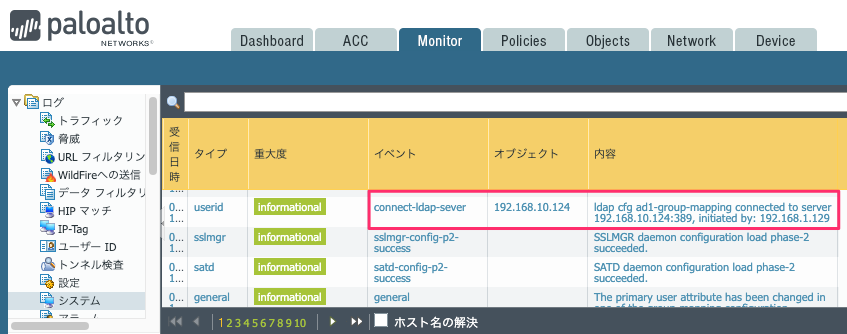
Monitor >>ログ>>システム へ移動し、イベントでconnect-ldap-serverにて、LDAPサーバへの接続が成功していることをログで確認します。
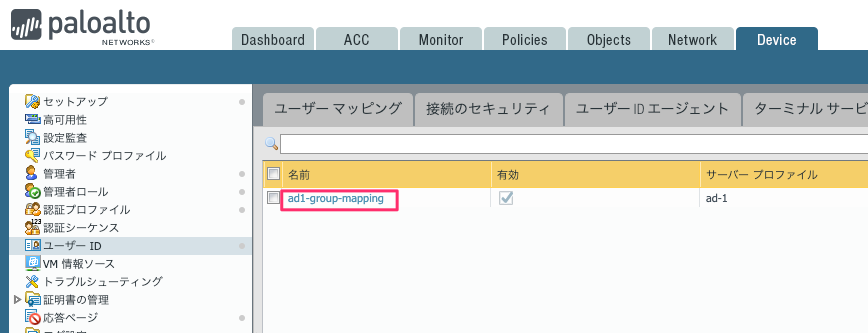
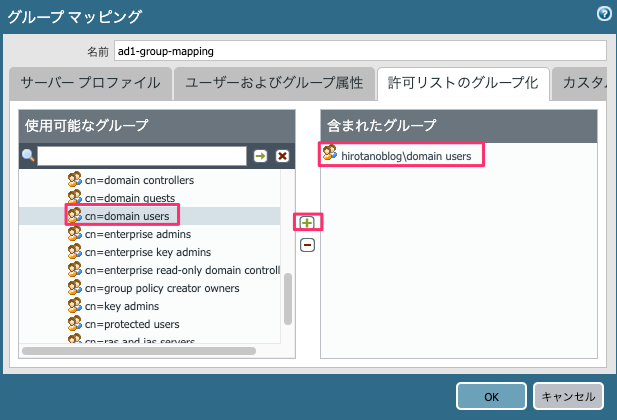
再度、Device >> ユーザID >> グループマッピング設定 へ移動し、先ほど設定したad1-group-mapping をクリックします。
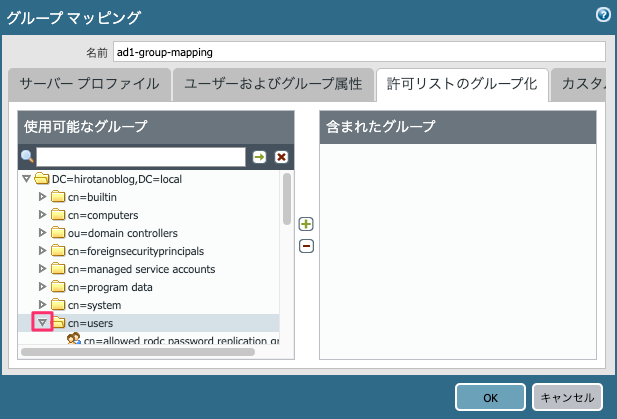
許可リストのグループ化のタブへ移動し、右側の含まれたグループにhirotanoblog/domain usersを含めます。
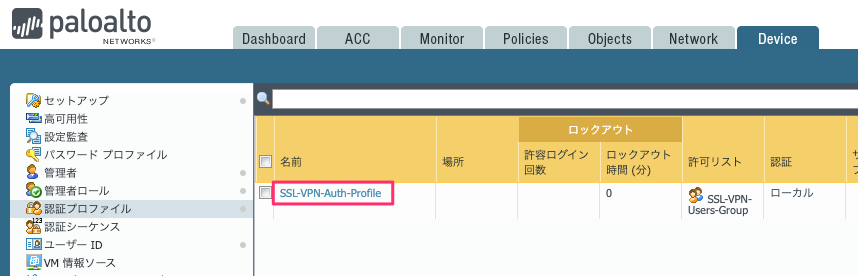
認証プロファイルの設定
Device >> 認証プロファイル より ローカルデータベースのユーザで認証する際に設定したSSL-VPN-Auth-Profileをクリックします。
ローカルユーザの認証からLDAPサーバへの認証に変更します。 認証タブへ移動します。
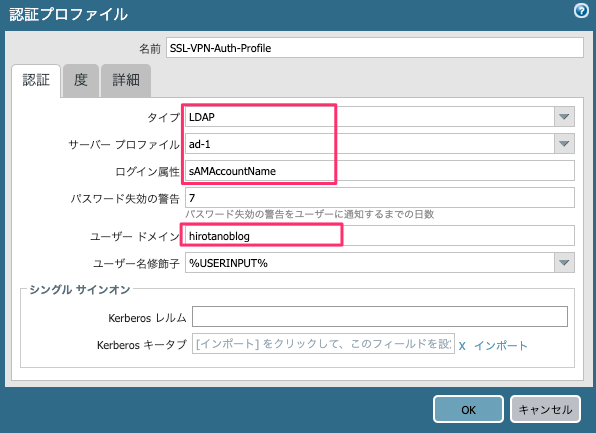
- タイプ:LDAPを選択
- サーバプロファイル:ad-1を選択
- ログイン属性:sAMAccountName と入力
- ユーザドメイン:hirotanoblog と入力
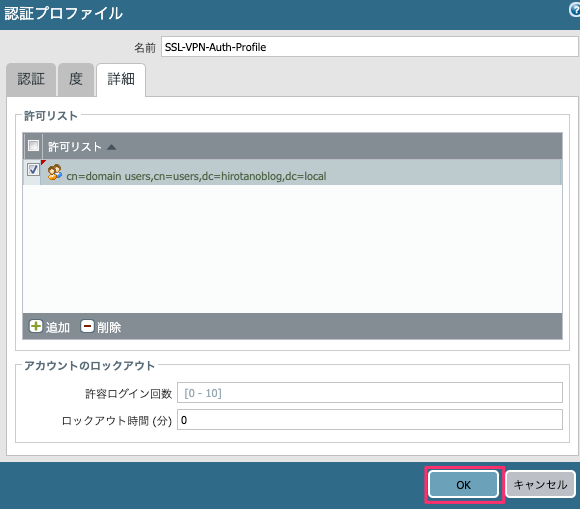
詳細タブへ移動し、許可リストからhirotanoblog/domain usersを選択します。
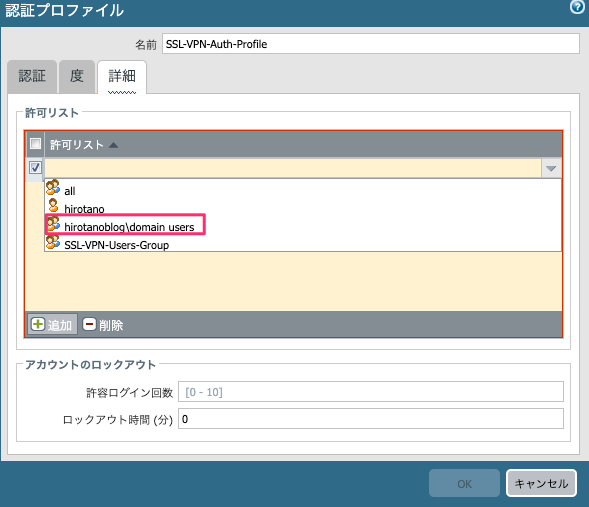
以下の通り設定されるので、OKをクリックします。
コミット後、端末から動作確認します。
端末からの動作確認
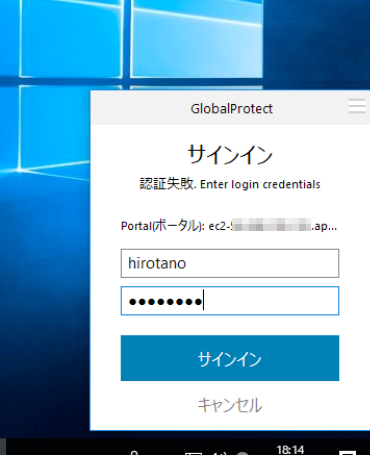
端末のGlobalProtectクライアントから、ユーザ名 hirotanoでサインインします。
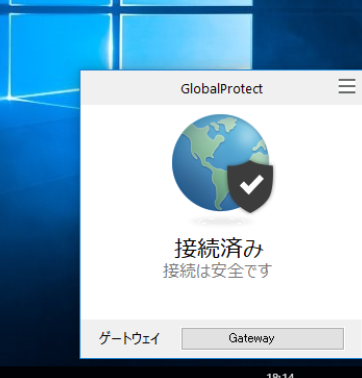
すると、以下の通り、ユーザ認証が許可され、接続済みとなります。
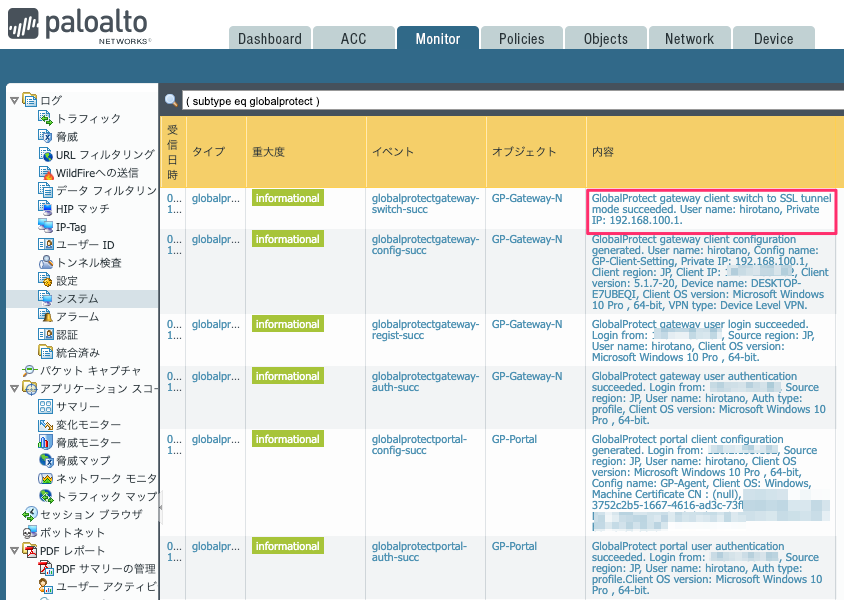
Monitor >> ログ >> システム へ移動し、globalprotect関連のイベントを見ると、ユーザhirotanoの認証が成功していることがわかります。
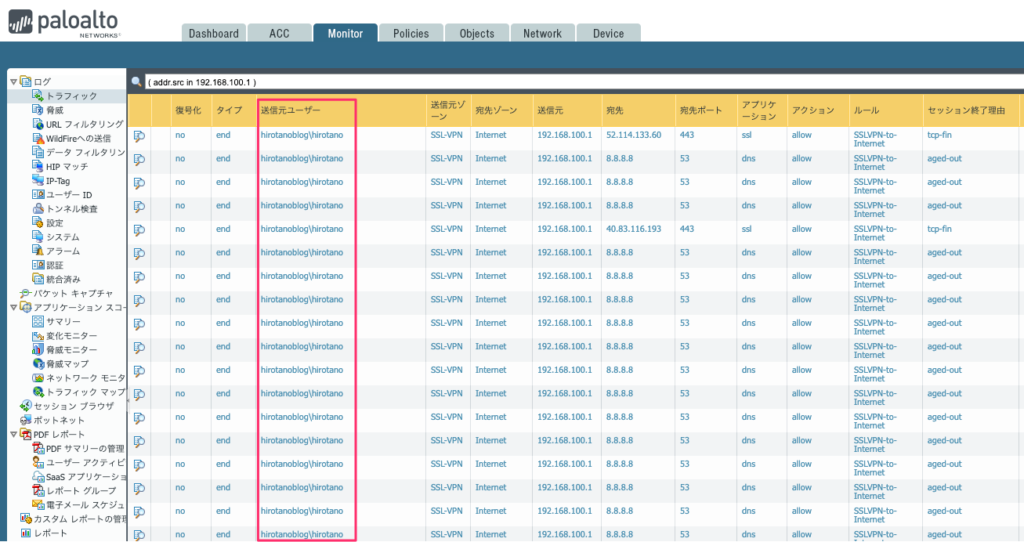
端末から任意のサイトにアクセスすると、セキュリティポリシーに従い、通信が許可されます。Monitor >> ログ >> トラフィックでトラフィックログを確認すると、送信元ユーザはhirotanoblog/hirotanoと認証されたユーザを認識しています。
コメント