
BIG-IP自身が名前解決や時刻同期ができるよう、DNSサーバやNTPサーバを設定することができます。この記事では、DNSとして、8.8.8.8と8.8.4.4を設定し、NTPサーバとして、time.google.comを指定します。
DNSサーバの設定
設定
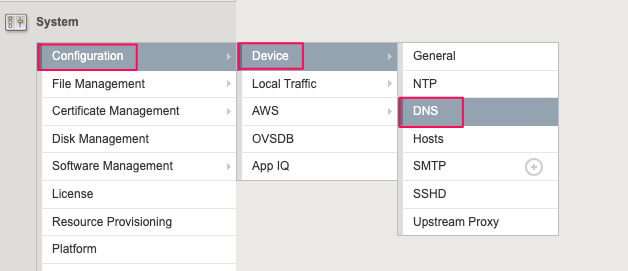
System >> Configuration >> Device > >DNS を選択します。
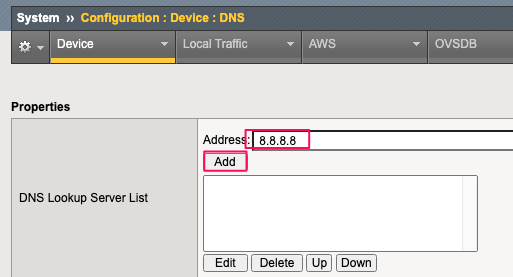
Device >> Properties の DNS Lookup Server List の Address 欄に8.8.8.8と入力し、 Add をクリックします。
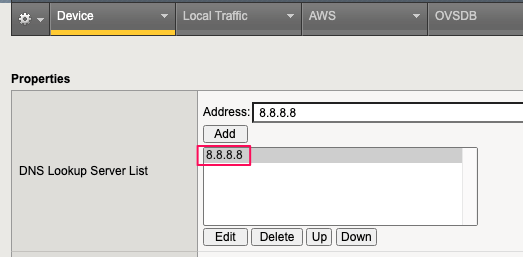
下記のように登録されます。
同様に8.8.4.4も登録します。
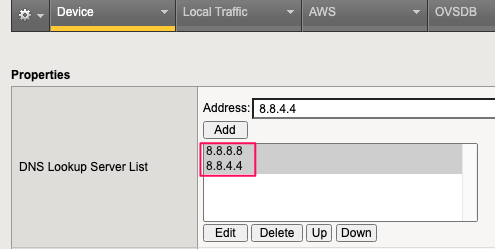
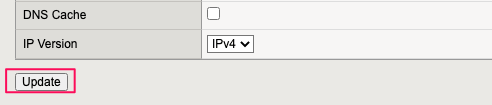
画面下のUpdateをクリックし、設定を反映します。
DNSサーバの設定は、CLI(list /sys dns name-servers)からも確認できます。
[admin@bigip-1:Active:Standalone] ~ # tmsh
admin@(bigip-1)(cfg-sync Standalone)(Active)(/Common)(tmos)# list /sys dns name-servers
sys dns {
    name-servers { 8.8.8.8 8.8.4.4 }
}
動作確認
time.google.com へ ping を実行すると、名前解決できていることが確認できます。
admin@(bigip-1)(cfg-sync Standalone)(Active)(/Common)(tmos)# ping time.google.com
PING time.google.com (216.239.35.0) 56(84) bytes of data.
64 bytes from time1.google.com (216.239.35.0): icmp_seq=1 ttl=94 time=37.6 ms
64 bytes from time1.google.com (216.239.35.0): icmp_seq=2 ttl=94 time=37.7 ms
64 bytes from time1.google.com (216.239.35.0): icmp_seq=3 ttl=94 time=37.7 ms
64 bytes from time1.google.com (216.239.35.0): icmp_seq=4 ttl=94 time=37.5 ms
tmshからbashに戻り、nslookupを実行することでも、確認できます。
admin@(bigip-1)(cfg-sync Standalone)(Active)(/Common)(tmos)# bash
[admin@bigip-1:Active:Standalone] ~ # nslookup
> time.google.com
Server:         8.8.8.8
Address:        8.8.8.8#53

Non-authoritative answer:
Name:   time.google.com
Address: 216.239.35.8
Name:   time.google.com
Address: 216.239.35.4
Name:   time.google.com
Address: 216.239.35.0
Name:   time.google.com
Address: 216.239.35.12
Name:   time.google.com
Address: 2001:4860:4806:8::
Name:   time.google.com
Address: 2001:4860:4806::
Name:   time.google.com
Address: 2001:4860:4806:c::
Name:   time.google.com
Address: 2001:4860:4806:4::
>
NTPサーバの設定
DNSサーバを指定することで、名前解決ができるようになったtime.google.comをNTPサーバとして指定します。
タイムゾーンの設定
日本時間(GMT+9)を設定します。
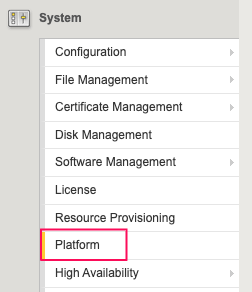
System >> Platform を選択します。
Configuration >> General Properties より、Time Zoneで、リストからAsia/Tokyoを選択します。
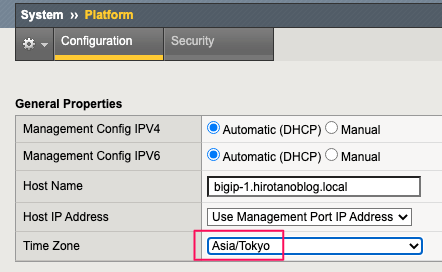
画面下のUpdateをクリックし、設定を反映します。

タイムゾーンの設定は、CLI(list /sys ntp timezone)からも確認できます。
admin@(bigip-1)(cfg-sync Standalone)(Active)(/Common)(tmos)# list /sys ntp timezone
sys ntp {
    timezone Asia/Tokyo
}
NTPサーバの設定
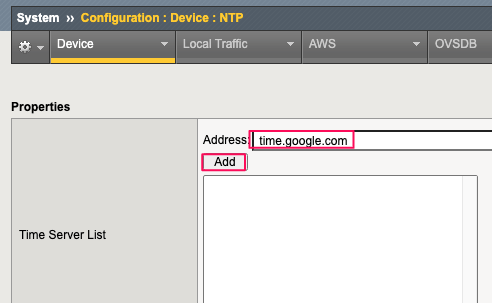
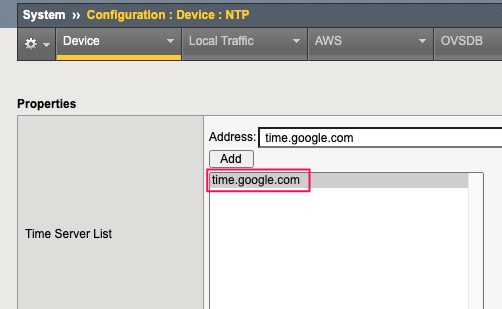
System >> Configuration >> Device > >NTP を選択します。

Address 欄に、time.google.comと入力し、Addをクリックします。
下記のように登録されます。
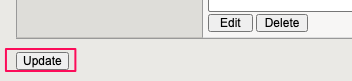
画面下のUpdateをクリックし、設定を反映します。
NTPサーバの設定は、CLI(list /sys ntp servers)からも確認できます。
admin@(bigip-1)(cfg-sync Standalone)(Active)(/Common)(tmos)# list /sys ntp servers
sys ntp {
    servers { time.google.com }
}
動作確認
NTPサービスが起動していることを確認します。
[admin@bigip-1:Active:Standalone] ~ # tmsh
admin@(bigip-1)(cfg-sync Standalone)(Active)(/Common)(tmos)# show sys service ntpd
* ntpd.service - start and stop ntpd
   Loaded: loaded (/etc/rc.d/init.d/ntpd; enabled; vendor preset: enabled)
   Active: active (running) since Tue 2022-04-19 20:31:36 JST; 5min ago
  Process: 25035 ExecStop=/etc/rc.d/init.d/ntpd stop (code=exited, status=0/SUCCESS)
  Process: 25045 ExecStart=/etc/rc.d/init.d/ntpd start (code=exited, status=0/SUCCESS)
   CGroup: /system.slice/ntpd.service
           `-25048 ntpd -g

Apr 19 20:31:37 bigip-1.hirotanoblog.local ntpd[25048]: Listen normally on 12 mgmt fe80::4db:78ff:fedd:526f UDP 123
Apr 19 20:31:37 bigip-1.hirotanoblog.local ntpd[25048]: Listen normally on 13 eth0 fe80::4db:78ff:fedd:526f UDP 123
Apr 19 20:31:37 bigip-1.hirotanoblog.local ntpd[25048]: Listen normally on 14 external fe80::450:64ff:fef3:c313 UDP 123
Apr 19 20:31:37 bigip-1.hirotanoblog.local ntpd[25048]: Listening on routing socket on fd #31 for interface updates
Apr 19 20:31:37 bigip-1.hirotanoblog.local ntpd[25048]: 0.0.0.0 c016 06 restart
Apr 19 20:31:37 bigip-1.hirotanoblog.local ntpd[25048]: 0.0.0.0 c012 02 freq_set kernel 0.000 PPM
Apr 19 20:31:37 bigip-1.hirotanoblog.local ntpd[25048]: 0.0.0.0 c011 01 freq_not_set
Apr 19 20:31:44 bigip-1.hirotanoblog.local ntpd[25048]: 0.0.0.0 c61c 0c clock_step +0.392805 s
Apr 19 20:31:44 bigip-1.hirotanoblog.local ntpd[25048]: 0.0.0.0 c614 04 freq_mode
Apr 19 20:31:45 bigip-1.hirotanoblog.local ntpd[25048]: 0.0.0.0 c618 08 no_sys_peer
bashに戻り、時刻同期ができているか ntpqコマンドで確認します。
admin@(bigip-1)(cfg-sync Standalone)(Active)(/Common)(tmos)# bash
[admin@bigip-1:Active:Standalone] ~ # ntpq -np
     remote           refid      st t when poll reach   delay   offset  jitter
==============================================================================
*216.239.35.12   .GOOG.           1 u   31   64   37   37.574   -2.733   2.112
* が表示されていると、そのサーバの時刻をソースに同期されています。
現在の時刻は、show sys clock もしくは、bashに戻り、date コマンドで確認できます。
admin@(bigip-1)(cfg-sync Standalone)(Active)(/Common)(tmos)# show sys clock
----------------------------
Sys::Clock
----------------------------
Tue Apr 19 21:37:08 JST 2022

[admin@bigip-1:Active:Standalone] ~ # date
Tue Apr 19 21:37:54 JST 2022
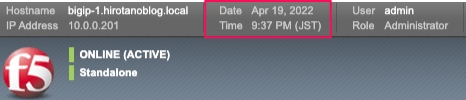
GUIの左上にも時刻が表示されています。
コメント